I built this without any personal injury to myself or others. That doesn't mean you will. So if you follow these instructions, please realize that you do so at your own risk.
Part 1: The Desk
The desk and mirror are completely independent, so if you are going to use an Alex desk or already have a desk you like and just want to build the mirror, skip to Part 2.
My original plan to use an IKEA 'Alex' Desk got derailed when I saw this beauty placed on the street for the garbage man:
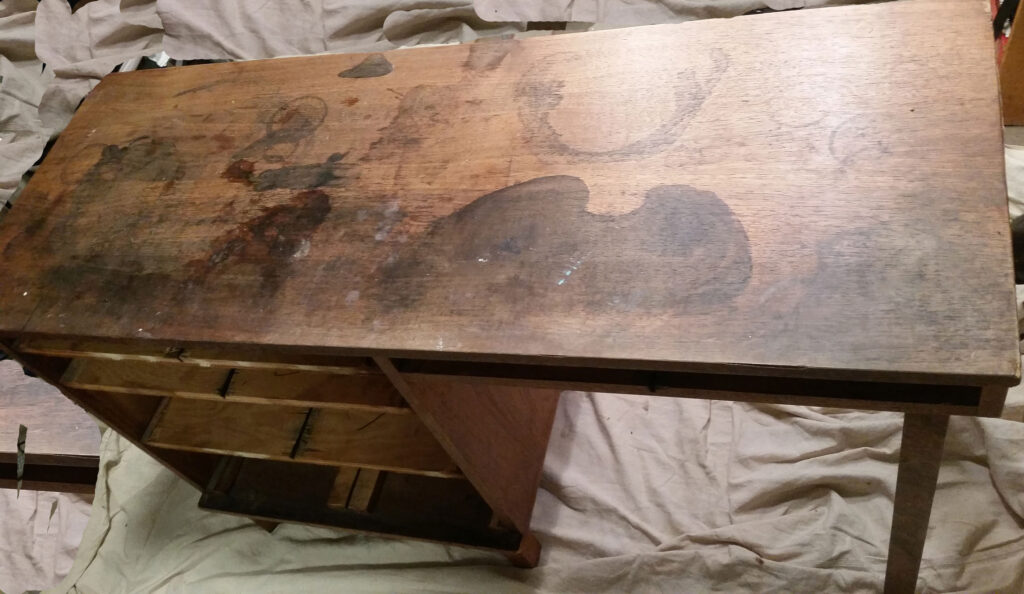
That's how it looked after I dragged it home and took out the drawers. It was pretty stained but otherwise in decent shape. If you think dragging garbage off the streets is weird, then you don't live where I do. In my town, there is always lots of great garbage on the street, and many people have furnished entire apartments using other people's cast-offs!
Here's what I used to refinish it:
- Sanding Sponge (220 grade)
- Tack Cloth
- Valspar White Furniture Paint. I recommend using a satin finish for a vanity.
- 6-inch Foam Roller
- Artificial Bristle Brush
- Minwax Polycrylic
I'm not a refinishing expert, but I think this part of the project turned out well. There were a few dings, dents, and some edges where the veneer started lifting. I could have repaired all of these with putty and glue, but I chose not to. I do not view this desk as a long-term companion. It has limited drawer space, and given my track record, I think those drawers will get filled up soon. That means in a year or two, I'm going to be yearning for an Alex or something better. Meanwhile, a coat of paint will make it match the mirror and look nice enough while it lasts. And the best part is that we just cut the project's entire cost in half! So awesome, right?
For my fellow non-experts out there, here's what I did:
- Sand it smooth with a damp sanding sponge.
- Let it dry, then rub it with a tack cloth.
- Paint it with Valspar Paint. It's both paint and primer, so there was no need for a separate primer step. And like when you do your nails, multiple thin coats are better than one thick one.
- Let it dry for 12 hours.
- Repeat the last two steps until you are happy with how it looks. This paint provided poor coverage. It took me three coats! Other paints could have done this with one or two coats, so I think the Valspar paint is pretty awful, and I wouldn't use it again.
- Let it dry for a few days until hardened. You can build the mirror while you wait.
- Cover the top with two or three coats of Polycrylic to make it easier to clean, sanding with the 220-grade sponge before each coat. It takes about two hours for the Polycrylic to dry, so this part goes quicker than the painting.
And here's the finished beauty:
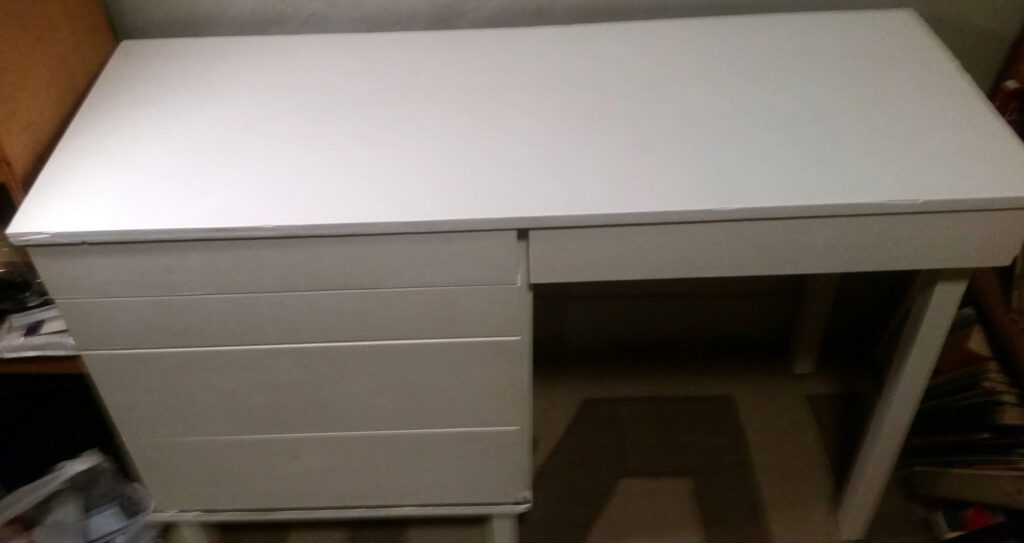
I think it turned out well, and the best part was that it only cost me about $50!
Part 2: The Mirror
I wanted a design that looked great, was easy to build, and worked. And, of course, I didn't want to spend much money and time. The cost for these parts will be between $150-$200 (I spent about $165), and not counting the time it takes to shop for stuff, it took me about two hours of active time to build it.
Here's a list of the things you need:
- 1 45" x 30" x 3/4" Melamine Composite (Home Depot)
- 2 Nuovo 5-light Vanity Bars (Amazon.com)
- 1 Nuovo 6-light Vanity Bar (Amazon.com)
- 2 Packs Sunco 62 Dimmable G25 LED's, Soft White, 2700 K, E26 Light Bulbs (Amazon.com)
- 1 mirror 36" x 24" (Lowes)
- Six 1/2-inch wood screws to replace the 1-inch wood screws that come with the light bars (they are too long).
- Two large wire nuts to replace two of the ones that came with the light bar (these are too small). Each of these nuts should be able to hold four wires.
- Hookup wire (I used lamp wire which came on a spool).
- Polarized extension cord. I used a two-prong cord. You can use a three-prong extension cord if your home has three wire sockets. (See the discussion in the building section for more information.)
- Foot dimmer (Amazon.com)
- Liquid Nails LN-2000 (Home Depot)
- OOK/HANGMAN 42" 400LB French Cleat Hanger (Home Depot)
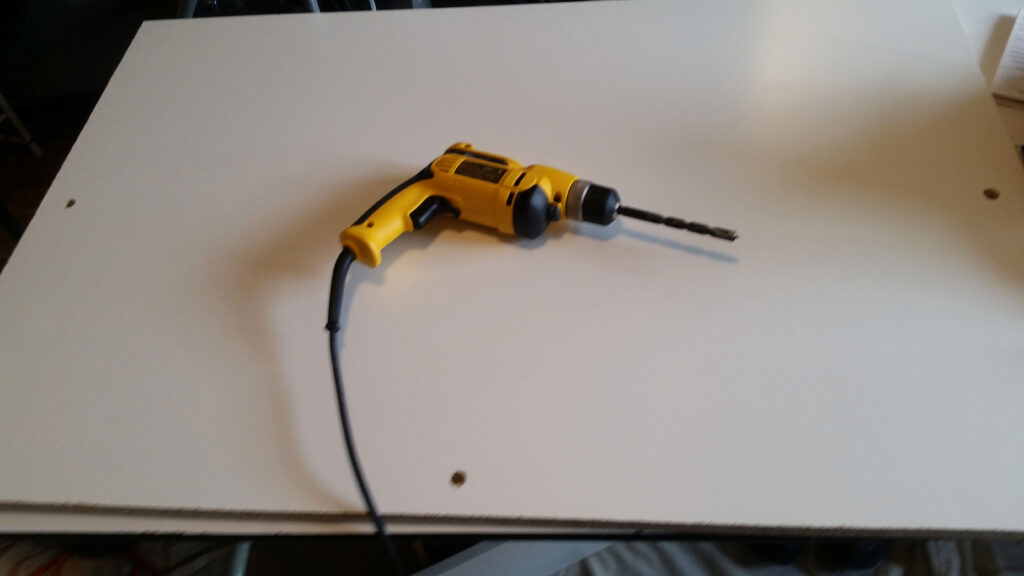
And you'll need at least these tools:
- Variable speed drill
- Screw drivers
- Caulk gun (For the Liquid Nails adhesive)
You might not own something like a caulk gun (they are cheap) or a good drill. You can rent drills pretty cheaply (in my area, you can rent a drill for $20 over 24 hours), so don't let that stop you if you want to build this.
The Design
I chose the melamine composite board because I like how it looks, and I didn't want to do more painting, sanding, and refinishing on unfinished wood. I love the beauty of wood, but I think white is the best color for a vanity since it is color neutral.
Melamine is more expensive than plywood, but since you don't need any paint or other finish, I think the end cost for both would be pretty similar. Home Depot will cut the wood to your specs (as long as it is wider than 12 inches), so figure out the size you need before you go. You'll end up with extra wood. Save it for other projects or a possible future upgrade to your mirror.
Of course, some of you are probably experts at finishing wood and would probably prefer to choose your wood and finish it as you wish. That could be amazing! I'd love to see a photo if you make a gorgeous mirror with different wood. Please send it to me!
Here's a rough sketch of the plan:
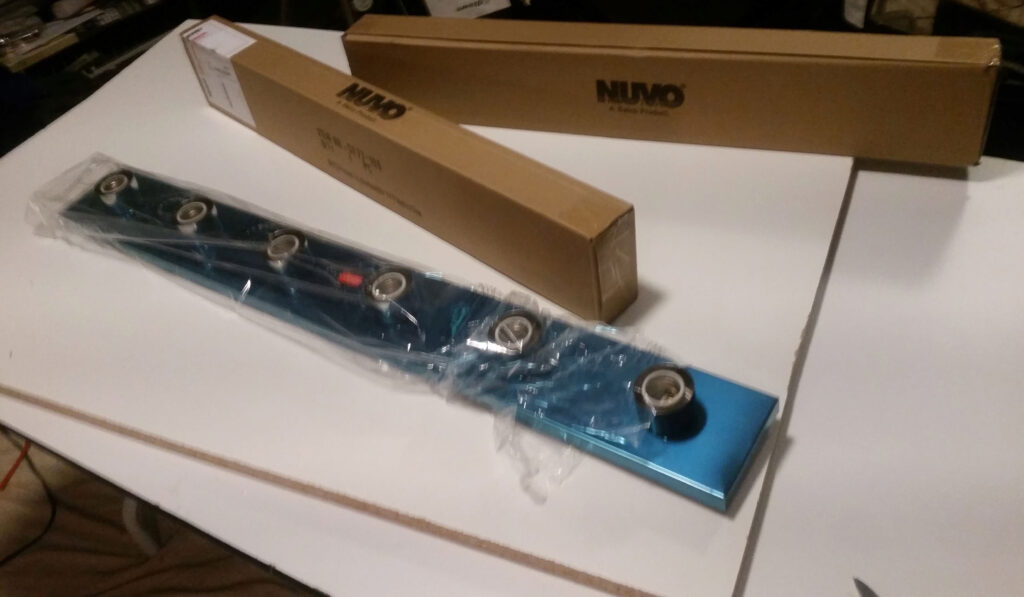
I fell in love with the way the chrome light bars looked and thought they would look gorgeous with the mirror. I was originally going to get the Sea Gull Lighting bars from Home Depot, but they won't have them in stock for another month. The Nuovo bars from Amazon are the same design and slightly more expensive, so I went with those. Amazon got the bars to me in pretty good shape. There was a small problem with the 6-light bar, which had a small chip on one of the ceramic sockets. I decided this wasn't serious, and since it was invisible and not dangerous, I just used the bar "as is."
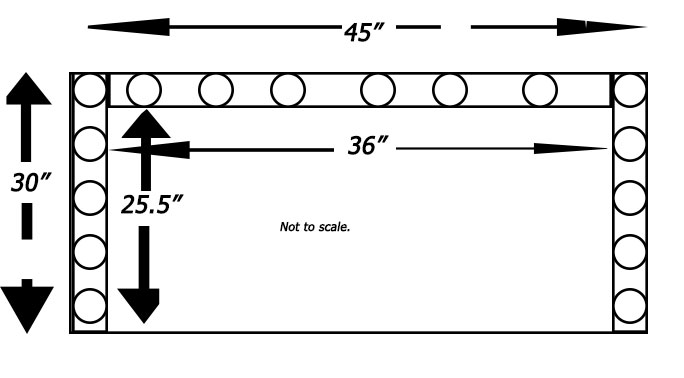
Designing the project was an exercise in finding the right balance between available, inexpensive mirrors and the length of the available light bars that still fit in my room. Custom mirror sizes get expensive fast. My first idea was to have five lights across the top and four on each side. That would give external dimensions of 30" x 24". Since each light bar is 4.25" wide (the width is wrong on Amazon.com), I could use a mirror of up to 30" x 19.75". I discovered that mirrors in this size range were hard to find and quite expensive: around $80-$150 or more. I noticed that you could get a standard size 36" x 24" mirror for only $24. By changing to a 6-light bar on the top with two 5-light bars along each side, I'll have enough room for this mirror, which still fits the available space. This small adjustment reduced the cost of the project by over $100! It leaves a little space at the bottom of the mirror, but I'm fine with that.
Your area might have different sizes of inexpensive mirrors. The variety of light bars available gives you many options for adjusting the project size if you need to use a different mirror. Both Seagull Lighting and Nuovo (and probably others) have light bars with 3, 4, 5, or 6 bulbs (corresponding sizes: 18", 24", 30" 36"). So you have options.
Let's Get Started!
It took me about an hour to get from here to the final gluing of the mirror.
Here are the parts:
I recommend leaving the protective plastic coating on the chrome until the last possible moment to avoid accidental damage to the finish.
1. Position the bars, then mark the holes for the wires
Remove the decorative light guards around each light socket and put them in a safe place. Leave the metal coverings on so you can accurately place the light bars.
Place the light bars around the board's edges, positioning them as you wish. Note the hole in one side of the cover is used to fasten it to the frame. This hole should be on the outside edge of the board.
Place the 6-light bar along the board's top edge. I suggest placing its long side right against the top edge. If you follow my measurements, 1/4 inch of slack will be on the left and right of the board after you put the sidebar against the 6-light bar. Make sure everything is square and lined up, then carefully remove the metal covering for the 6-light bar on the top. It's easy to accidentally change the bar's position as you remove the cover. If that happens, reposition and check everything. The positioning is crucial, so take the time to get it right.
Now that you've got the cover off without disturbing the light bar's position, take a pencil and, holding down the light bar, so it doesn't move, run it around the 1/2-inch hole in the middle of the bar. We will feed the wires through this hole to the back of the mirror. Do the same thing with the other two light bars.
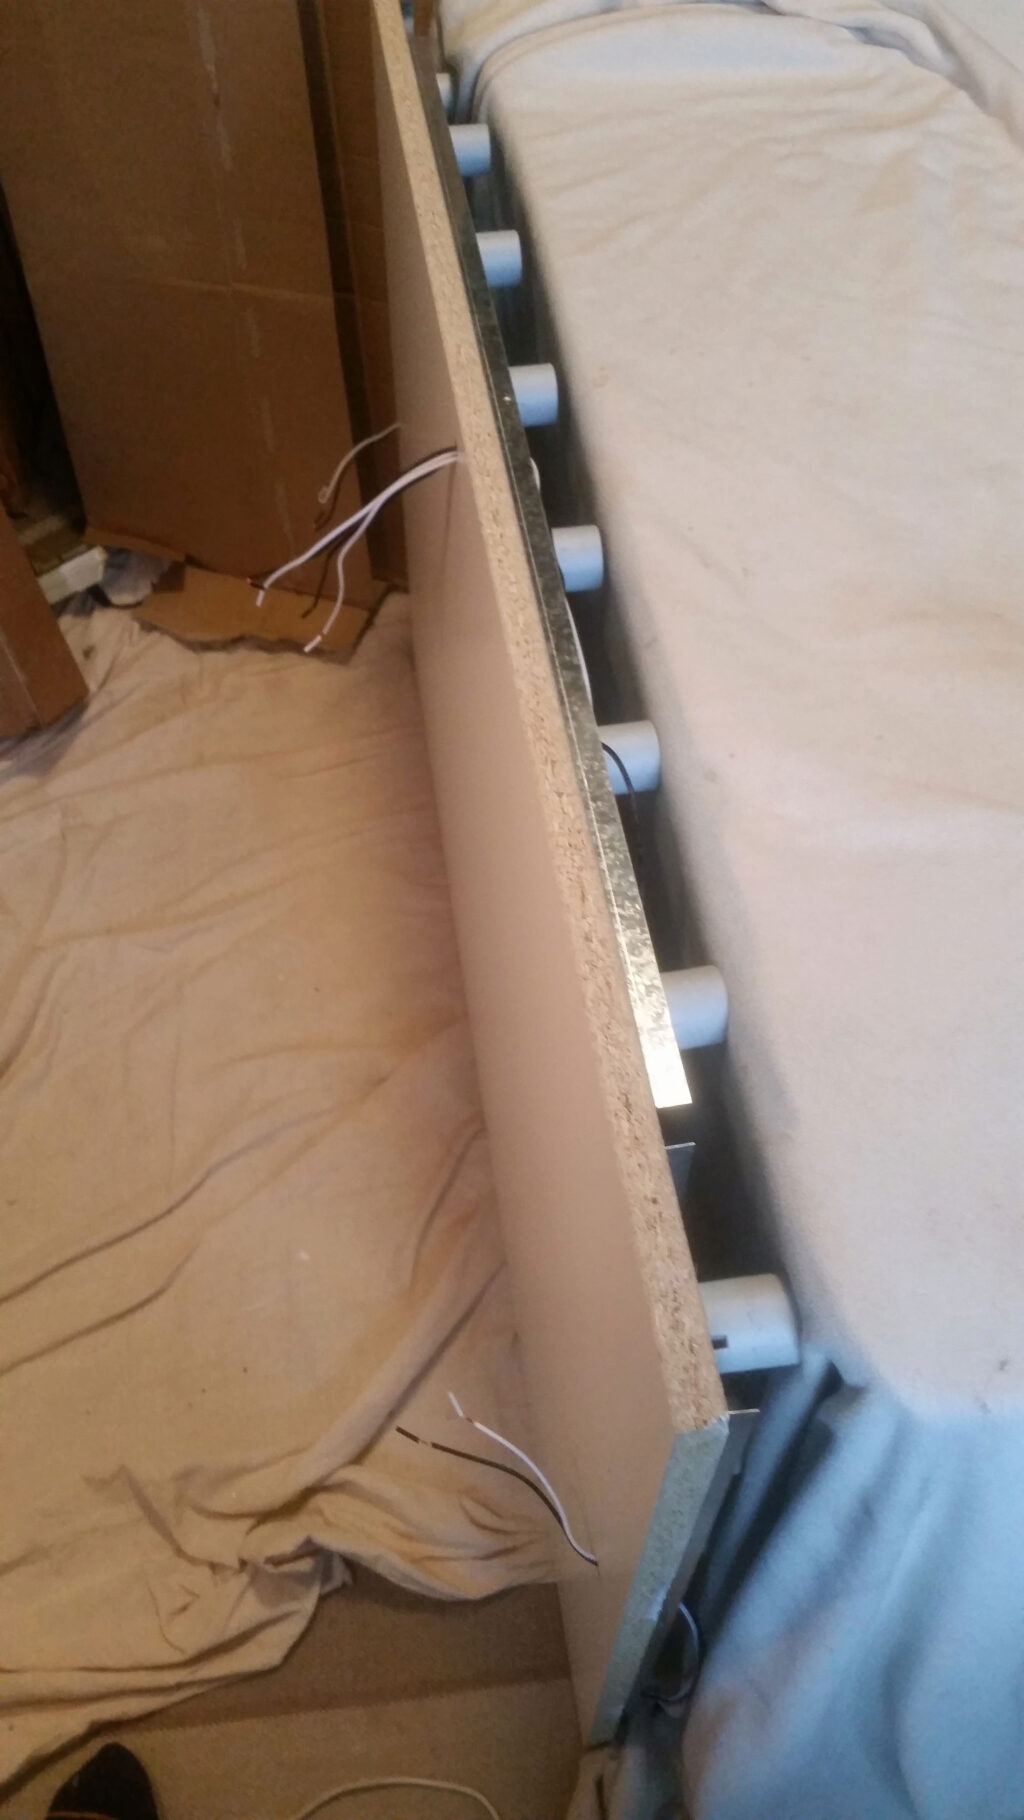
Remove the light bars and drill three 1/2-inch holes at your marks. Melamine can be slippery, so use the slow speed of the drill at the start. Remove the bars and dust off the board. Here's a picture:
2. Attach the light bars.
The wood screws that come with the light bars are too long to use with our 3/4" thick board. Take them to a hardware store and get 1/2-inch screws in a similar diameter (you'll need six). The precise size doesn't matter. It will work great if it fits through the narrow part of the mounting holes and the screw-head is larger than the mounting hole.
Place the six-light bar on the board and line up the hole in the light bar with the hole you drilled. Make sure the ends of the bar are also in the right place. You may need to place the cover back on the bar to double-check its position.
Once it's where you want it, use the 1/2-inch wood screws you bought to fasten the bar to the board. I drilled small guide holes first, then used a screw attachment on the drill to finish. Here's a picture of one end:
Repeat this with each of the two side light bars. Position them carefully!
3. Thread the wires through the board.
Take the ends of the wires and thread them through the hole you just drilled:
The top bar is wired as two independent sets of three, so you'll have four wires for that one. The sidebars have only two wires since they are each one complete circuit. Here's how the top should look now:
3. Wire the circuit
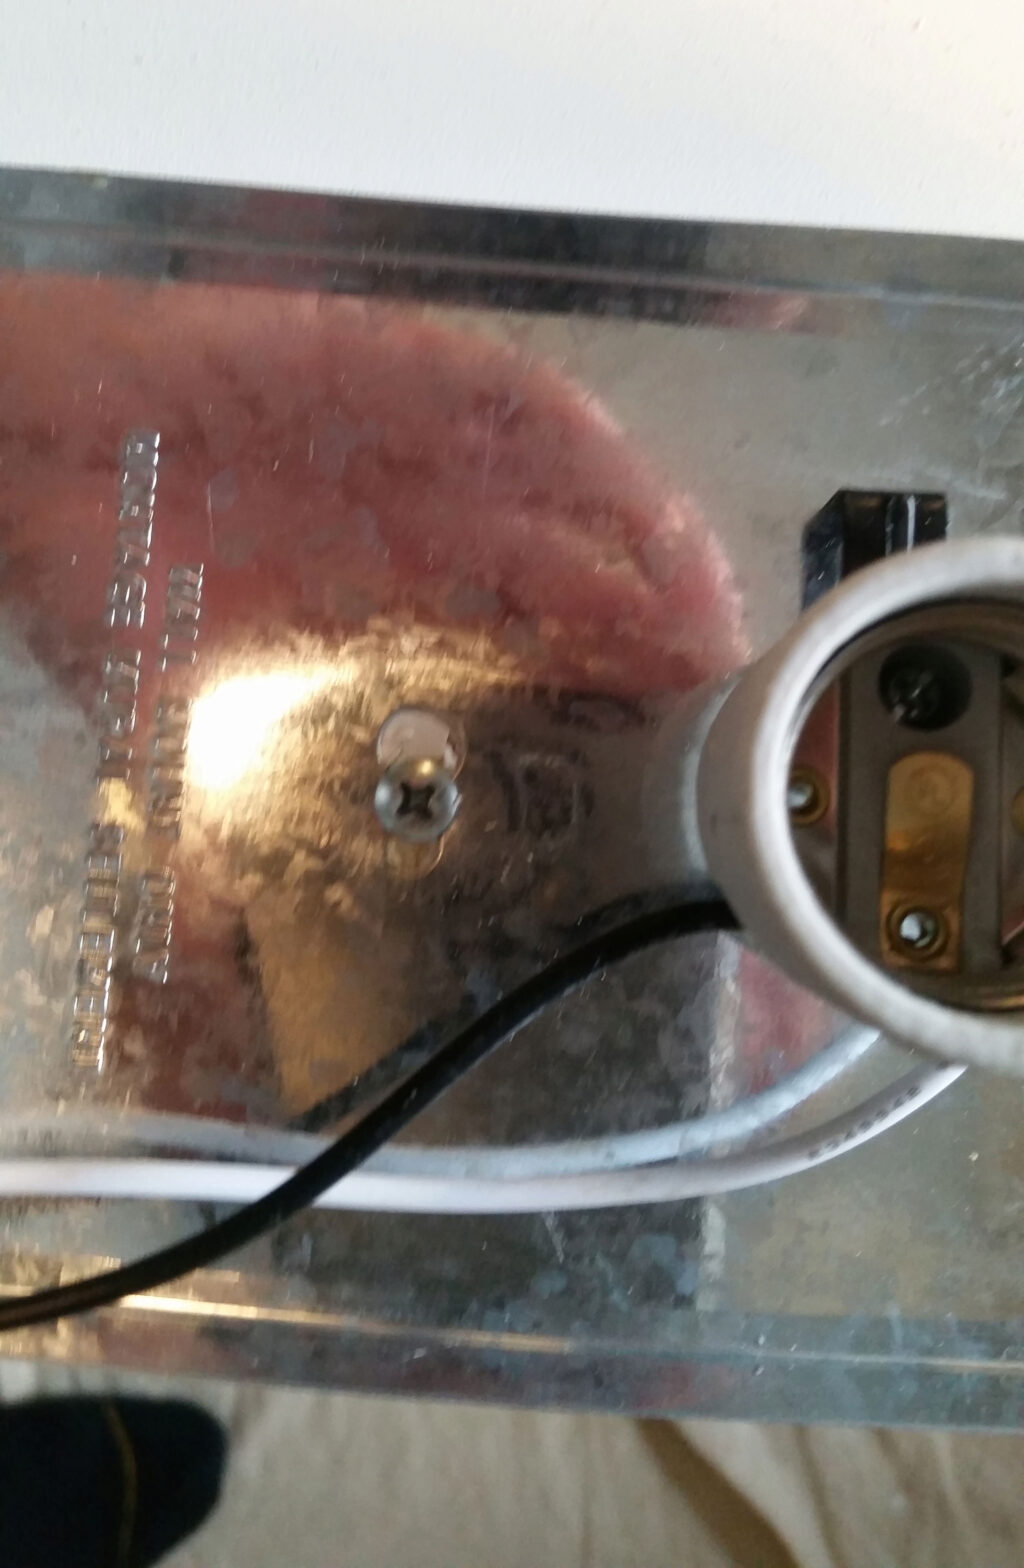
I recommend taking the board off your work surface and leaning it against something. That will help protect the light sockets from any accidental damage:
Note the wires showing through the board.
Let's talk about wiring and safety for a moment.
The white wire is what we call "neutral," and the black wire is "live" or "hot." Always connect the same colored wires, and never connect black to white!
Lamp wire, which I am using to connect the bars, isn't usually color coded. With this type of wire, the neutral (white) wire has a special design, while the hot (black) wire is left plain. Here's how the neutral wire of my lamp wire looks:

And here is how the hot wire looks:
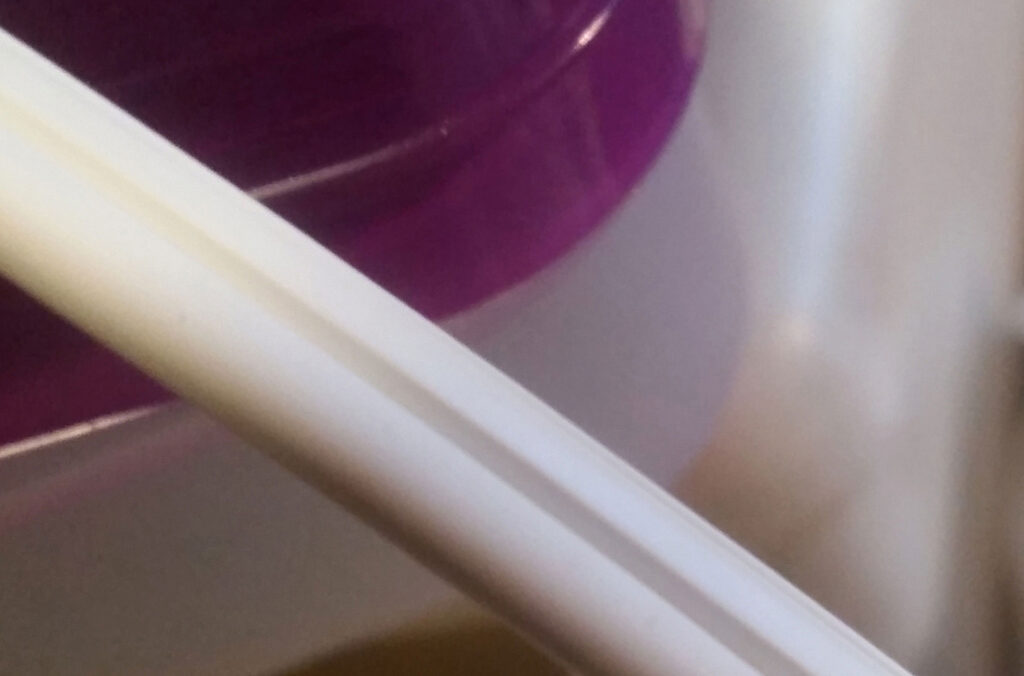
As you can see, the neutral wire has a 'ribbed' design, while the hot wire is completely smooth. Designs differ, so yours might not look the same as this. Do not continue this project until you can confidently identify the neutral wire! If you aren't sure, ask at the store or find an electrician to help you.
How to Use the Wire Nuts
The wire nuts provided with the light bars will only work with one of the connections. You'll need to get larger ones to connect the other two light bars. Do not try to stuff more than two wires into the wire nuts that came with the bars! It won't work, and it's not safe either.
To use the wire nuts, first strip the insulation from the ends of your hookup wire. Gather the wires you want to connect and line them up along the line where the insulation stops. Now:
- If the exposed wires on your hookup wires are shorter than the ones from the light bar, strip off more insulation until they are the same size.
- If the exposed wires on your hookup wires are longer than the ones from the light bar, trim them until they are the same size.
- If all the exposed wire lengths are the same size, you are good to go. Put on the wire nuts.
Do not pre-twist the wires. Just gather them together and shove them into the wire nut. Holding the wire in one hand and the nut in the other, push down and twist the nut until the wires below the wire nut connection point twist together. There should be no exposed copper. If there is, redo the connection or use electricians' tape to cover the exposed copper.
Do the Wiring
Now that you know how to use wire nuts, let's do the wiring:
- Strip off the insulation from the ends of the lamp wire on the spool. Don't cut the wire yet - leave it attached to the spool.
- Starting with one of the sidebars, connect the white (neutral) wire from the bar to the neutral wire coming from the spool with the wire nut that came with the light bar.
- Now connect the black (hot) wire from the light bar to the hot wire from the spool with the other wire nut.
- Moving to the middle light bar, pull enough hookup wire off the spool to reach it, then cut it. Don't aim for a 'tight, straight" wire. It's best if there is a bit of slack. Tension is not your friend here. Strip the ends of the wire.
- Strip the ends of the wire coming from the spool. The other end will eventually connect to the final light bar on the board's edge, but leave it uncut on the spool for now.
- Connect the neutral wires for the middle light bar together. You will have four in total. There will be two from the six-light bar, one from the sidebar you just connected, and the new wire from the spool. Use the wire nut to connect them all just as you did before.
- Repeat the previous step, using the black/hot wires.
- Pull enough hookup wire from the spool to connect to the final light bar (remember that a little slack, not tension, is your friend). Cut it and strip the ends.
- Take the extension cord and cut off the "appliance" end, leaving the plug attached. Strip the ends. You will notice the same decoration on one extension cord wire as on your lamp hookup wire. That's the neutral wire. You must connect this to the other neutral wires on the mirror!
- Make the final connections: Gather all the neutral wires for the third bar together. There will be three of these: one from the middle light bar, one from the final light bar, and the neutral wire from the extension cord. You're an expert now, so use one of the remaining two large wire nuts to connect them all.
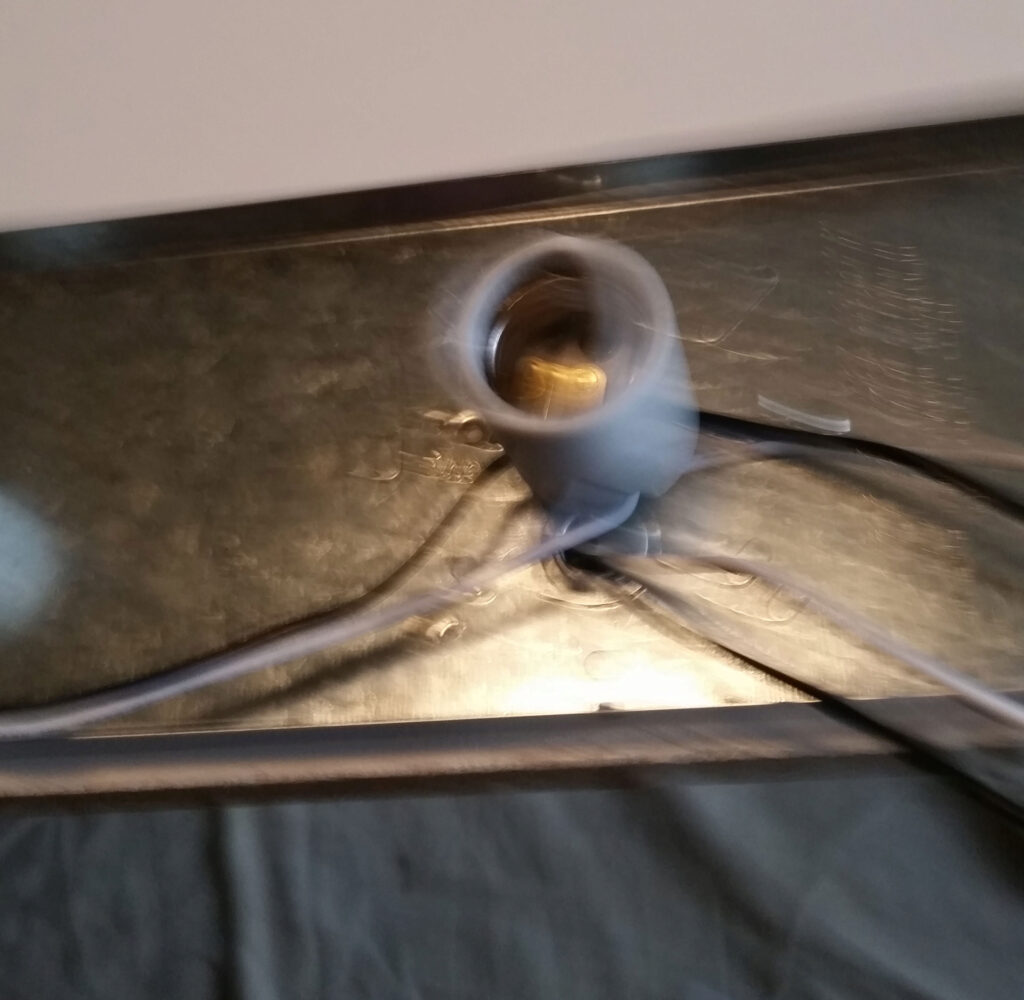
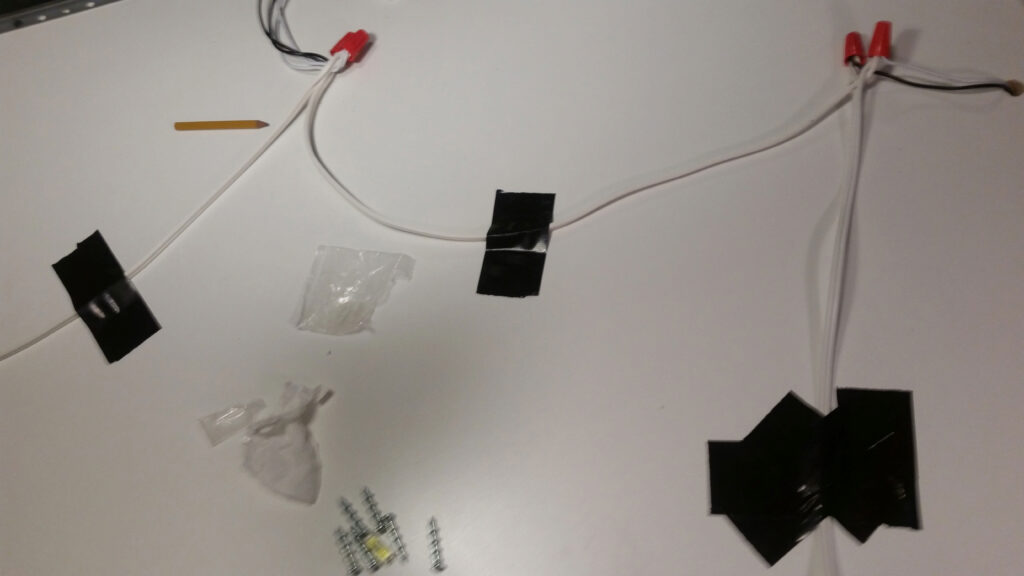
- Do the same thing with the black wires. Congratulations! You have just wired your mirror! Here's a picture:
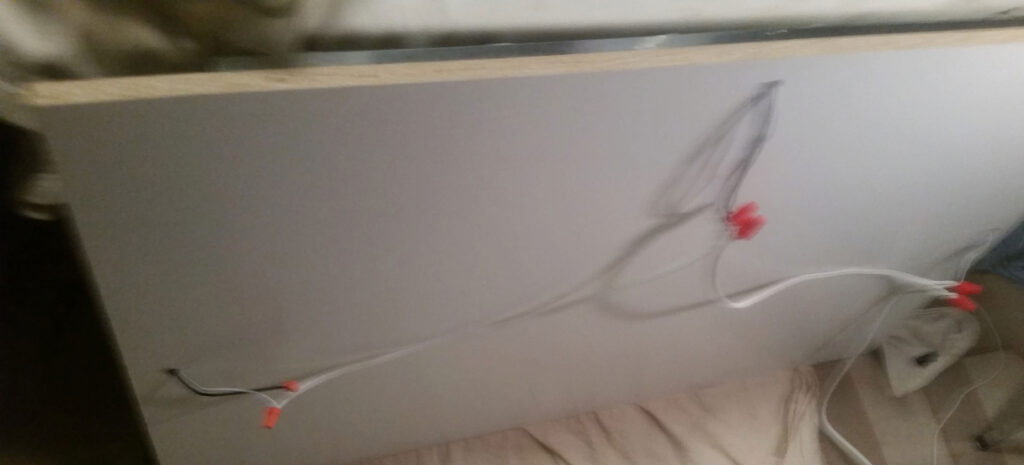
Test the circuit
It's a simple circuit, but things can always go wrong. Take the time to do a quick test. Take four of your light bulbs and screw one in each sidebar and one at each end of the top light bar. (Remember that the top light bar is two separate circuits, so we must test both sides.) That's four bulbs, total. Then plug it in, and all the lights should light up:
What if it didn't work?
If yours worked, just skip this section. If it didn't work, use the strict application of logic to solve your problem. Please make sure you unplug the mirror before doing any work on the electrical stuff!
Mine worked the first time, but here are some things that could go wrong:
My circuit breaker or fuse tripped the second I plugged it in. It could be a fault in the light bars, but the most likely scenario is that you accidentally wired hot-to-neutral somewhere (black-to-white). Double-check all your connections and fix the one(s) where you made a mistake.
Nothing lights up. The most likely cause is a loose connection from the extension cord to the mirror. Redo that one.
Only some of the bars light up. It could be a bad light bulb. Check that first by trying it in a lamp that you know works. If that checks out, the most likely culprit is a loose connection. The bar could be bad (although this is very unlikely.) Check the bar by wiring it directly to the extension cord
What about the bare copper wire on the light bar?
You probably noticed a bare copper wire on the light bars. That's used for three-wire circuits with three-prong plugs and sockets and is called the "ground wire." A three-wire circuit connects the cover, frame, and ground wire from the wall socket. The idea behind this grounding is that should the frame ever become electrically "hot," the ground wire will provide an instant path to the ground, short out the circuit, and trip the circuit breaker or fuse. Without the ground wire, should the frame become hot and you were to touch it, your body could provide the path to the ground. That would hurt like hell and could be fatal.
My building is older and doesn't provide three wire circuits in most of my rooms. For this project, I would only be seriously concerned about safety if I were going to use the mirror in the bathroom, where water and bare tile could easily provide a ground path. In other rooms, with carpeted floors and no water, it is slightly more dangerous to use the two-wire circuit than a three-wire one. And since every other light in my room uses two wires, I am not exposing myself to any more danger than before.
If you have three wire plugs in your home, then, by all means, feel free to modify the circuit above to include the grounding wire. Make sure you attach the copper wire from the cover to the frame using the small screw provided with the bar. The ground wire from the cord will either be bare copper or (more often) colored green.
Never attach the neutral (white) wire to the third (copper/green) wire! Not only is this a bad idea, but it is also against the electrical code of the U.S. This might seem logical since both white and copper connect to the ground, but there are situations where the white wire could become electrified. If this happened and you had the white and copper wires connected, you would not have a good situation on your hands! So don't do this.
If you have a two-wire circuit and want to use a three-wire one for safety because this discussion has left you in a panic, you can install a GFCI. I'm not going to explain how to do that here, but you can pay someone to do that if you don't know how.
Attach the covers
Put the unit back up on your work table. I recommend a bit of padding on the table to protect the wire nuts. Then:
- Peel the protective cover off one of the covers and place it on its frame. Ensure the hole with the screw is along the outside edge of the frame.
- Repeat with the other two light bar covers.
- Take the small metal screw from the ones provided, and fasten each cover to its frame.
- (Optional) Remove the stickers from the decorative light guards that have them, washing off any adhesive.
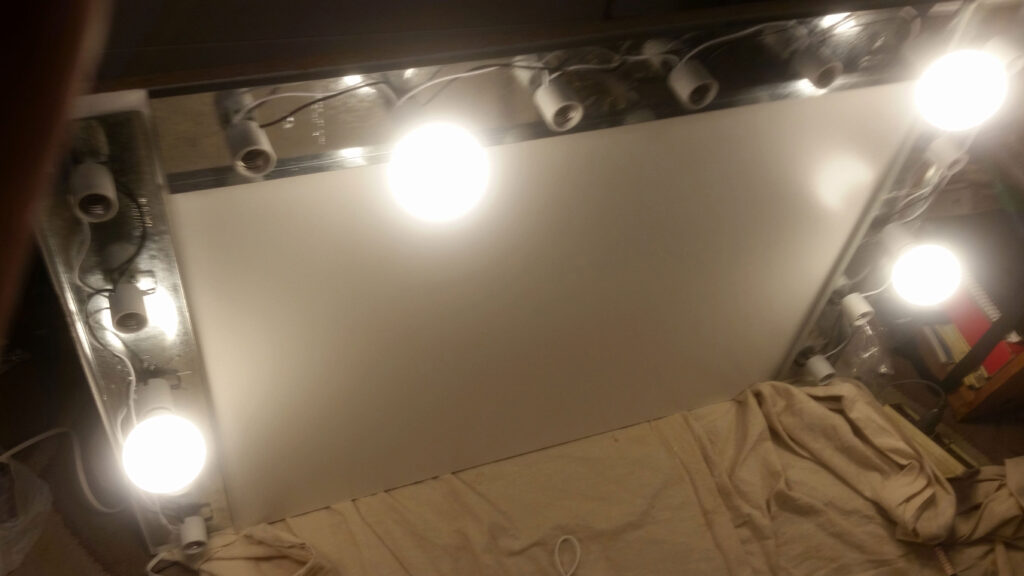
- Place all the light guards on the sockets.
We're getting close to the finish line! Take a moment to savor your work:
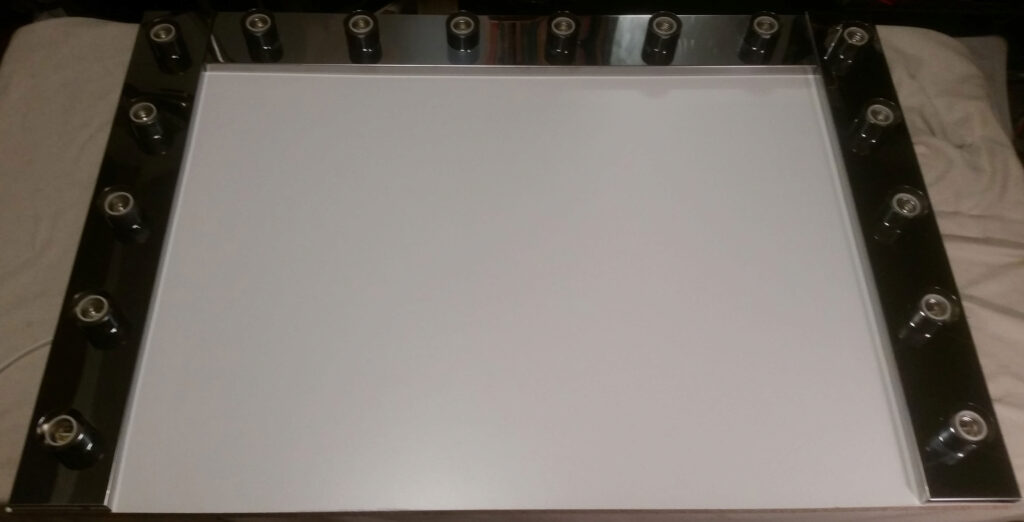
Glue the Mirror to the Board
Put a blanket on a work surface to protect the mirror, then lay it face down on the blanket. Clean the back of the mirror and the board with some detergent or other cleaner, and make sure it is dry before proceeding.
I used LN-2000 from Liquid Nails to attach my mirror. Feel free to use another adhesive to attach the mirror, but ensure that it is safe for mirrors (not all the adhesives from Liquid Nails are "mirror safe"). Some adhesives will cause the mirror to deteriorate over time due to chemical reactions with the mirror silver and the adhesive. LN-2000 is safe for mirrors. If you have never used this type of adhesive before, here is how you proceed:
- Unscrew the tip, revealing the threads and the plastic stopper at their tip.
- Taking a sharp utility knife, slice off the plastic stopper. Don't slice off the threads, just the stopper at the very end!
- Screw the tip back onto the threads, then slice off the very end of the tip. Most caulk guns have a slicing hole in the handle of the gun you can use for this. If yours doesn't, just use a knife.
- Place the tube of adhesive into the gun.
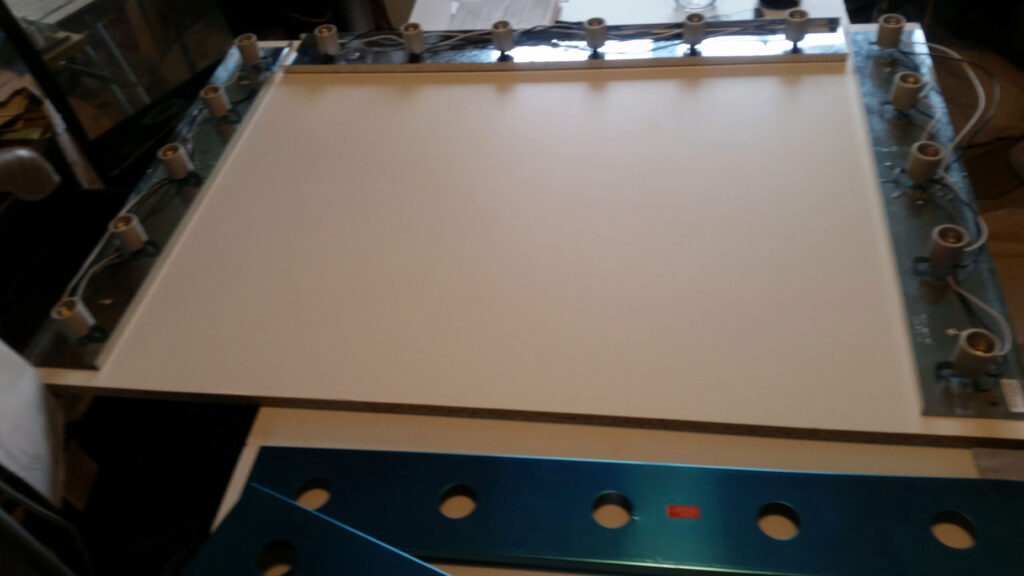
I used the entire tube to glue my mirror. You want to make alternating vertical lines along the length of the mirror. Don't get too close to the edges; if you do, the glue might squish from the sides when you press the mirror onto the board. Here's a picture of how it should look just before you place the mirror on the board:
Take the mirror and carefully place it on the board. Don't slide the mirror on! Instead, place the top edge of the mirror where you want it to be on the board, then lower the rest of the mirror onto the board. I think it looks best if the top of the mirror goes right against the edge of the top light bar, but it's your mirror, do what you like. Here's how mine looked right after I attached the mirror:
Doesn't that look just smokin' hot? Don't admire it too long. If it's not just the way you want it, you have only a few minutes to correct it before the adhesive hardens. Then press firmly all over the mirror to ensure it is down solidly. Press hard. Then cover the mirror with a blanket and put a couple of rows of heavy books or other weights all over it to keep it pressed firmly against the board. Leave it for 24 hours.
Mounting the Mirror and Final Touches
Uncover the mirror. Hopefully, it is now glued forever to the board. We need to figure out how to get this on our wall. Once again, safety is an issue because this sucker is heavy, gurl! Do you want to worry about those gorgeous bulbs breaking? No. And when you hang a mirror, you need to at least double the weight because when you clean it, you press down on it and that increases the downward force on the mirrors.
We could get away with a 200lb hanger, but I spent a few extra dollars in the interests of safety and went for 400 lbs. I decided to use a French cleat, a wonderful invention from that country! The OOK hanger is a modern version of it. The one thing you might not like is that the bottom of the mirror will be slightly out from the wall. That doesn't bother me, but if you don't like it, look around for another solution.
Fasten the mirror bracket. This is easy. Use your drill with the screwdriver attachment, and you'll finish quickly. It looks like this:
Add some strain relief. Everybody needs stress and strain relief. Electrical cords are no exception. I was hoping to find a metal part that would work, but no luck there, so I just used duck tape. It won't survive a tough pull, but it should work for most of the accidental tugs that occur around your home:
Remember, we don't like tension in our cords, so make sure there's a bit of slack between the tape and the connection points!
Now fasten the wall bracket. Ordinarily, fastening things to walls is a nightmare because you have to find studs or use the right fastener. An amazing new invention called a "Walldog" works in almost everything! I used these in my plaster wall - I drilled a 5/64'' guide hole and then hand screwed these in (the manufacturer tells you not to use power tools to put these in place.)
To position the mirror, I drew a line on the wall at the top of my desk, found the center of it, then went up 34" (that's the height of my mirror plus four inches.) I drilled a starter hole and fastened the wall cleat right in the center. Using the level (there's a channel for it so you can attach it to the cleat right in the middle), adjust the ends of the cleat until it is level, then drill holes and install screws at both ends.
Continue placing screws at intervals along the cleat to support it until they are all used up. Here's how it looks on my wall:

Now hang the mirror. This is where you start wishing you didn't live alone. It would be easier with help, but I got it done. Take the mirror and place the top above the cleat, then let it slide down, and the two cleats will fit together. You can adjust it by sliding it left or right along the cleat as needed.
Put the light bulbs in. Just screw them in, one-by-one. The bulbs are the most expensive part of this project! The G25 size is pricey, but I think it is worth it for its decorative impact. E26 sockets are the standard size in the U.S. (The 'E' stands for "Edison," and the 26 is the diameter in millimeters). If you aren't in the U.S., I'm sure it won't be that tough to adjust to your local standards.
Using different lights. If you want to use different lights than I chose, there are a couple of things to keep in mind: If you use LEDs and want to use the dimmer (which I highly recommend), make sure you get LEDs designed to work with a dimmer, not all of them do. And if you are not using LEDs, you need to know the power requirements. The six-light bar can handle 100 Watt incandescents, but I think the highest wattage you would want is 60 Watts - remember, there are 16 lights! So using 60 watts, you want to make sure everything you have can handle 16 X 60 = 960, or call it an even 1,000 Watts.
LED's have two different wattages: There is the amount of light they output (the ones I used are equivalent to 60-watt incandescent light bulbs). Then there is the amount they consume. Each LED uses only 6 watts, less than 100 watts for the entire mirror! Plenty safe and easier on your electrical budget as well!
Finish up Vacuum the floor, install the dimmer and put the desk back. There are probably fingerprints on that mirror. Clean it with a foaming mirror cleaner like "Zep" and a clean, dry cloth (it's better for the lights).
Now turn on the lights and say, "Hey!, We're done!" Do a little dance, light a candle to Dom de Luxury, and call it a day.
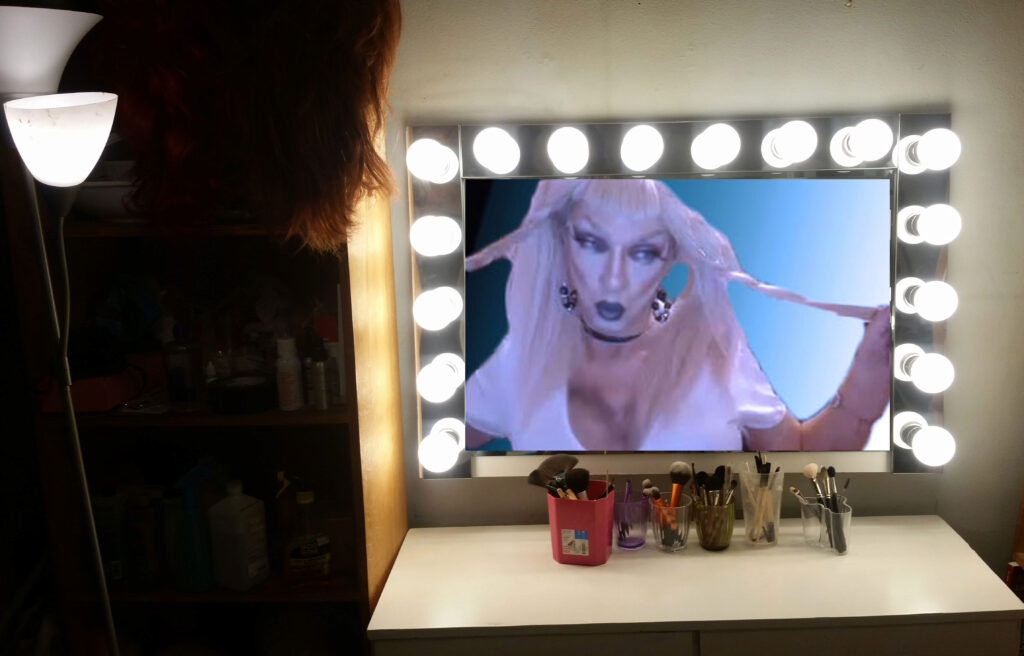
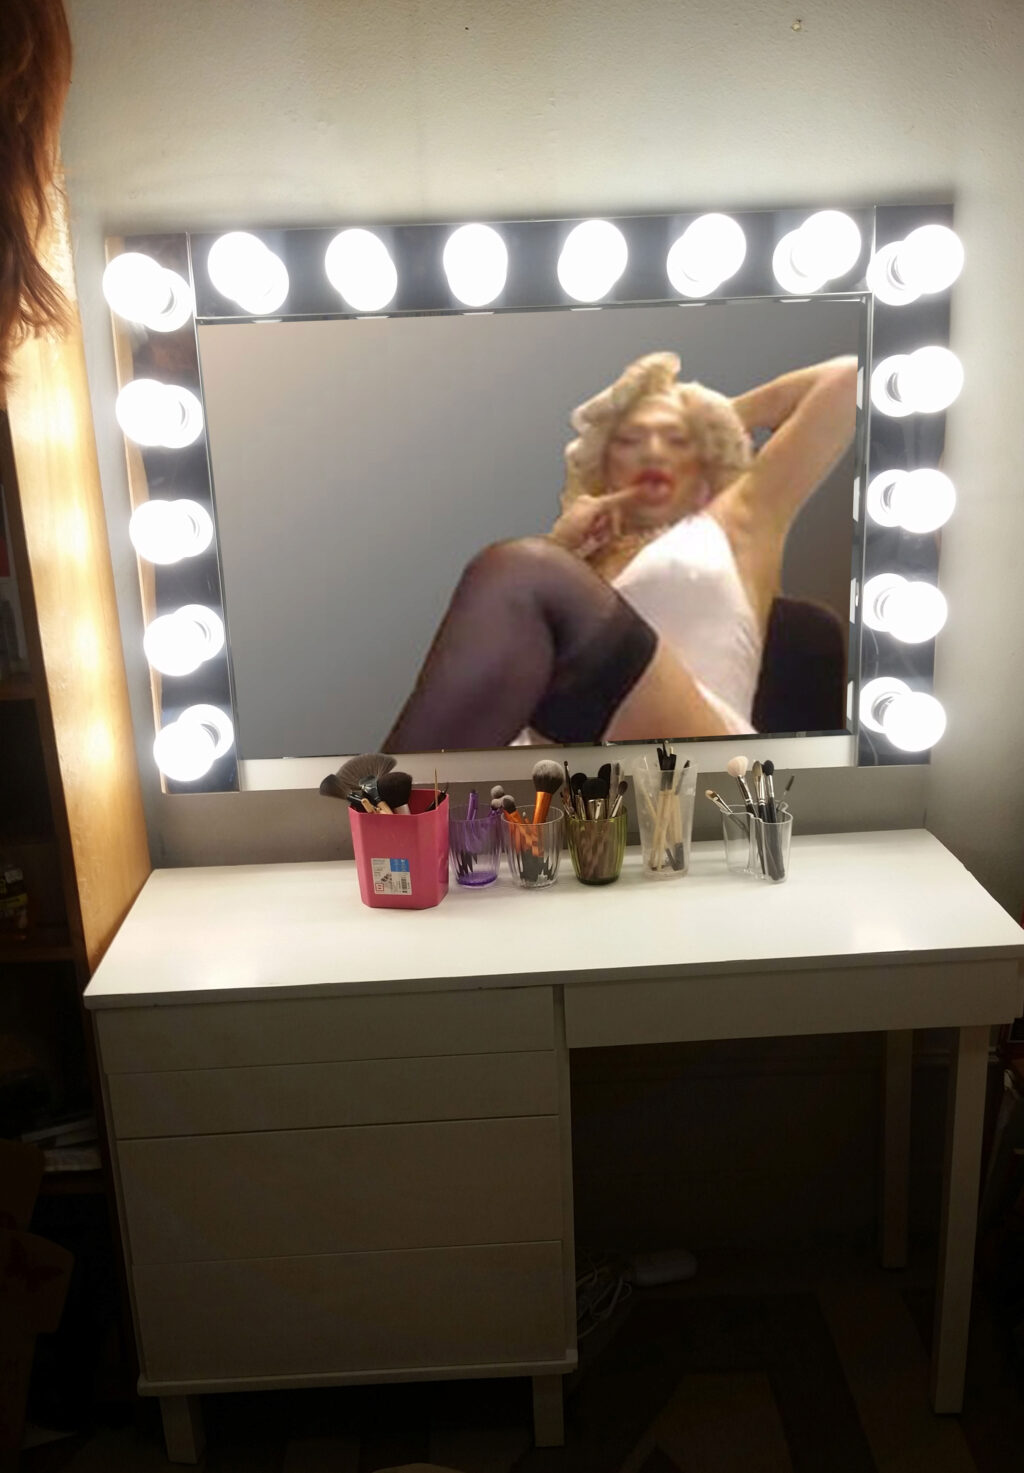
Here are a couple of pictures of the finished job with some old pictures of your Pammy photo-shopped into the mirror:
I'm pleased about how this turned out, and trust me if I can do this, so can you! As always, you can send me questions, comments, or anything friendly to me anytime. I love hearing from you!