Mystique, with her unique ability to turn herself into anyone she sees, is the dream girl of every makeup and special effects lover. For people like me, who (until recently) spent most of their lives wishing they were somebody else, she's an icon. I discovered her as a child, and she instantly became my favorite character and escape fantasy. Like me, she wasn't happy with who she was. But unlike me, she had the magic ability to transform herself into acceptability. Imagine it! Without surgery, she could become a beautiful woman or a gorgeous guy. It was a trans kid's dream. Finally, after years of fantasy, I discovered the power of makeup and learned if you worked hard enough at it, you could own a little bit of that Mystique magic for yourself.
Halloween is also every makeup lover's sacred holiday. Of course, Mystique was the first character I considered doing. But I always made another choice because I didn't feel I had the skills to do her justice. But this year, I felt confident enough to take on the challenge. I was happy with the result So many of you wrote to say how much you enjoyed it! Thank you! So this article is about how I went about turning myself into Mystique!
I don't do a lot of cosplay, but I have tremendous respect for the people who do it. They spend immense effort, money, and time on it and are so creative. They also have a fantastic amount of knowledge gained through years of hard work. My friends Alyson and Jake, two superb cosplayers, were kind enough to listen to my ideas. Their feedback and suggestions were crucial to the success of this look. I can't thank them enough!
THE BODY
Since I am a team of exactly one, going the traditional route of painting my body blue and attaching prosthetics was not going to work. So the first step was finding a good bodysuit. Alyson suggested Aesthetic Cosplay. You can see it here.
There's a newer version of this suit now. I'm not sure what the differences are, but this is the one I bought. It was $140.00. That might sound pricey, but remember, this is not an off-the-rack costume. It was custom-made. You send them your measurements, and they send you a suit. I think that's an excellent price for a custom costume! Incidentally, when you take your measurements, remember to put on any body enhancements (corset, padding, breast forms) before measuring. The suit is extremely well-made and fits like a glove. You might not be able to get it on if you send in measurements without accounting for the enhancements!
In addition to your measurements, you can specify a few other things. I also asked for a Vertical Zipper (this might not have been the best choice) plus forearm (another $6.00) and crotch (another $15.00) zippers. The forearm zippers were a big help! It's much easier to get the costume on with your hands, and you can touch up your makeup and keep the costume makeup-free. The crotch zipper is essential! Since the body suit fits snugly, it is hard to get in and out of. I can't imagine having to do that in a bathroom emergency!
Being custom-made, it takes a while to get. I ordered it with plenty of time to spare, and Aesthetic Cosplay came through like a champion. I was delighted with the suit, and I recommend them highly!
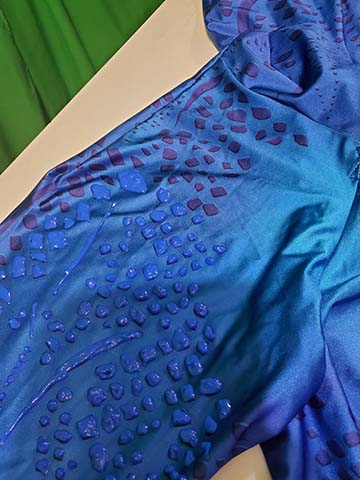
The suit's creator printed the scales on the fabric. While beautifully done, the authentic Mystique's scales are 3-D. Jake and Alyson suggested "Dimensional Fabric Paint" (they call it "Puffy Paint") as a way to create 3-D scales. This stuff is fantastic! You can squirt it on fabric (or anything). It is incredibly thick, which allows you to create 3-D shapes. It will hold these shapes as it dries, but it does shrink a bit, so it's best to be generous. Being inexperienced, I spread the suit out on a table and dived right in. Here's a picture of the suit to show you the printed pattern and the puffy paint applied. You might also be able to spot the problem with this approach:
Notice the folds in the cloth? It was next to impossible to cover larger areas with paint because fabric folds over itself! I had to wait 24 hours for the color to dry. Then I stuffed the suit with newspaper and paper towels and went to town:
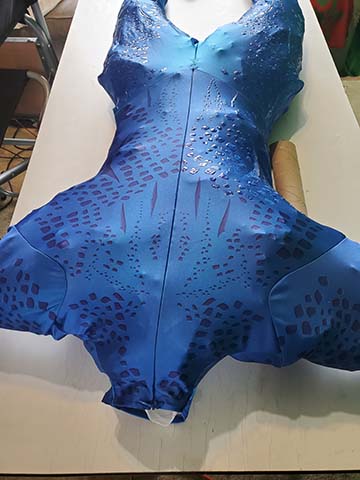
As you can see, it was much easier this way:
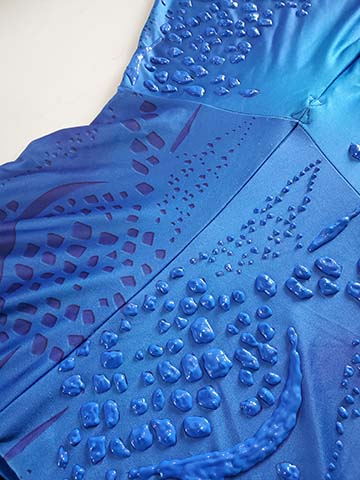
Of course, you still have to wait for the paint to dry before you turn it over or do some of the angles. It does take a lot of time. I worked several hours each day for three days to finish the scales. It also took a lot of paint: six bottles on the suit and part of a seventh to create the face scales. You can find Puffy Paint in your local craft store. Here's a link to the brand and shade (Royal Blue) I used.
Remember to shake the paint very hard before you start. And have fun. Be creative, and feel free to add patterns to the ones printed on the suit. The time will go faster if you have fun with it.
THE FACIAL SCALES
The costume doesn't come with a mask, and I didn't want one. You want people to see your facial expressions, which they can't with a mask. The usual way to create scales is using silicon (probably best) or latex (probably most accessible). You can then use paint or makeup on the result and glue them to your face. My skills in this area are precisely zero. That's a problem. But the Puffy Paint had given me an idea: I bought some tulle fabric in royal blue from a fabric store. It looked like this.
I didn't buy it from Amazon, so I am not vouching for this particular product. And this is way more than you will need. I cut off enough of it to reach about halfway around my head and clipped it to my hair. I wanted the scales to cover the top of the lace on the wig I planned to use, so I positioned it there. It nearly reached the bottom of my nose. Then I drew a line along my hairline, across my eyes (but below my eyebrows), and down my nose with chalk. I had my customized prosthetic shape, so I just cut along the line.
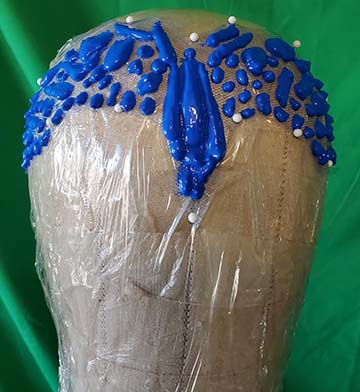
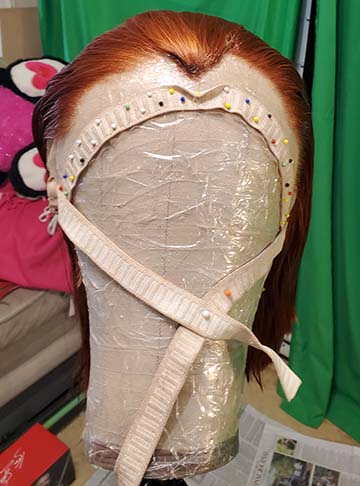
I put some plastic wrap on my wig head to act as a backing for the prosthetic I was creating, then pinned the fabric on top of that:

Then, I used the puffy paint and some reference photos of Mystique to freehand some scales on the tulle. I preferred Rebecca Romijn's makeup, so I used her photos. Then I left the fabric on the head to dry for three days:
I may have left it too long on the wig head. I intended to remove the plastic backing from the prosthetic before gluing. Unfortunately, it proved impossible to remove! It might have been better to remove the prosthetic from the head 24 hours earlier before the paint had completely dried.
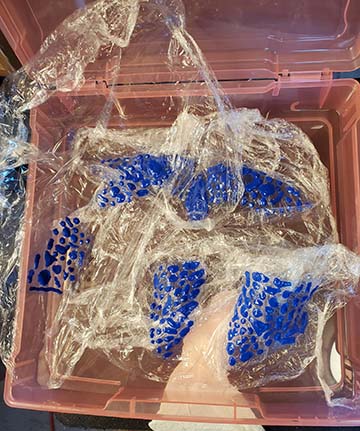
I followed the same procedure for the cheek and neck prosthetics. Here is how they all look, stored in a box before wearing them:
THE WIG
Mystique has very distinctive hair. It's a particular shade of red and styled very specifically. Having already spent a lot of money on the costume and paint, I wasn't eager to buy an expensive wig dedicated to Mystique. I took a chance and ordered a generic one from Amazon.
It is not a great wig, but it was sufficient for this purpose! It needed some work. As supplied, the wig was way too long for Mystique. So after pinning the wig to the wig block, I cut it to slightly above shoulder length. I saved the cuttings, which came in handy later. If you do this, the hair will be unnaturally thick, so I recommend thinning out the wig's bottom with some thinning shears. Mystique's hair is edgy, so don't try to make it look too pretty.
I then straightened the wig with a steamer and used the heat from the steamer to help comb it directly back since that's how she wears it:
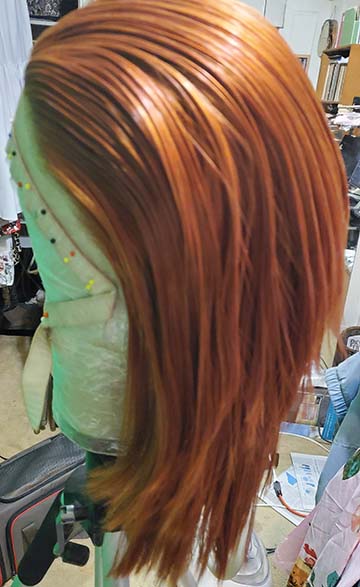
After it dried, I used some Got2Be gel and Got2Be Glued hairspray to secure it. And Mystique's hair looks very product heavy to me:
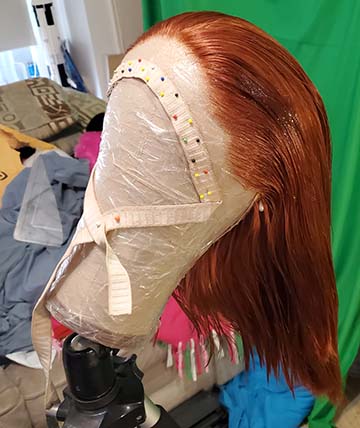
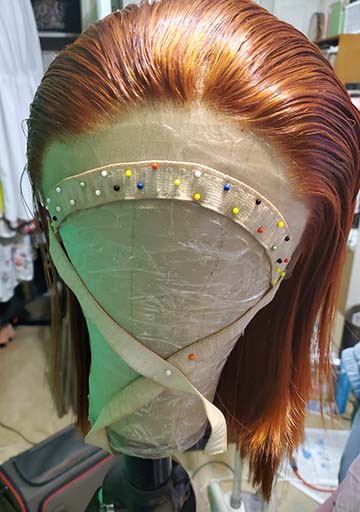
Mystique has a marked widow's peak but not this wig. The right way to add one is to use a ventilating needle to sew the hair into the lace at the wig's front. Unfortunately, having spent so much time on the other parts of the look, I didn't have time to do it right. So sue me: I used a hot glue gun and some of the hair I saved from the cut to form the widow's peak. It turned out surprisingly well, although it will not last as long as a ventilated version:
THE MAKEUP
The makeup for this look is pretty simple. To build the blue color for my face and neck, I used Mehron water-based body paints. I have an ample Mehron "Paradise" palette. I don't use them much, but they worked great! I don't have much experience applying this kind of makeup, so I'm not recommending my procedure as the best one. I used a disposable makeup sponge dipped in water to hydrate the paint to a creamy consistency. Then, using the same sponge, I stippled it onto my skin. It will look a little spotty but don't worry about that. The other coats will take care of any unevenness. Since your ears will be more exposed in this look, pay special attention to them. You'll probably need to switch to a brush to get the blue in every nook and cranny of your ears.
Start with the lighter "lagoon" blue and put that on as best you can. Then cover it with the "Dark" blue from the same palette. (You can buy these as individual colors if you prefer).
I used some Mehron blue cream paint to add depth. I was thrilled with this combination of makeup. It looked beautiful and was a perfect match for the color of the bodysuit!
I used a little light powder to contour my T-zone. The eye makeup was black eyeshadow, a small blue shimmer above that, and black eyeliner. I added some eyelashes. I have to have eyelashes. I finished it off with some blue lipstick from Miss Fame beauty.
One nice accessory for this look is colored contacts. I've been delighted with the Pinky Paradise company. I used the yellow contacts they call Mad Hatter The official recommendation for inserting contacts is to do it before you put on any makeup. That's by far the safest method. I don't always do that.
PUTTING IT ALL ON
I put the wig on right after I finished the makeup. Ordinarily, this is my final step, but I had to put it on sooner because I designed the prosthetics to cover the wig's lace.
Once the wig was on, I proceeded to the prosthetics. I discovered I couldn't remove the plastic wrap from the fabric. It was "glue them on as they were" or "give up on the face scales." I had no choice: I used pros-aid to glue the plastic to my face. It was OK, but it was hot. And the prosthetics did not adhere as well to my face as I had hoped. They tended to lift off my skin. This wasn't a big deal since I could press them back down when needed. I suspect the heat was a factor here because it encouraged perspiration. I do love how they looked!
The final step, putting on the bodysuit, proved harder than I expected. It was so beautifully tight-fitting that I had a terrible time pulling up the zipper. With back zippers and no one around to help, my trick is to fasten a safety pin to the zipper, fasten a string to the safety pin, and use it to pull the zipper shut. The zipper was hard to pull up because the fabric was so tight, and the bobby pin kept pulling out! I finally took a heavy-duty hairpin and twisted it tightly against the zipper pull. That did the trick.
Even with all the problems, I wouldn't have it any other way. Once it was on, the bodysuit looked fantastic and felt great.
IMPROVEMENTS
It's always good to consider how you might improve a look. I could do a better job with the facial prosthetics. If I do this again, I may learn how to make better ones. If I try this method, I will remove them from the wig head sooner. The backing might come off in that case.
The suit is fantastic, but the collar didn't blend well with my body. If I wear this again, I think I will cut away the collar and perhaps even a bit of the suit's front. That will allow me to glue the suit directly to my skin, making a more seamless blend.
I won't buy another bodysuit just because of this, but the back zipper was challenging from an "ease of use" perspective. There were options to have a front zipper and a "U-shaped" back zipper. I hated the idea of a front zipper because even the best invisible zipper would show. Possibly the U-shaped zipper would be easier to use. I don't know. If you try this, please let me know how it works.
Finally, Mystique is supposed to look completely naked. The problem with all skin suits is that it is obvious you aren't naked because the suit doesn't follow your cleavage right to the skin. I haven't figured out a way to fix this. One possibility is to make a hard "boob bra" and glue that into the suit. Another one might be to attach a string to the suit's cleavage. You could then pull it in and tie the string in the back. Considering how hard the suit is to put on, the boob bra idea would probably make it even harder.
I was thrilled with this look and its reception! Thanks for your compliments and encouragement. Thanks to my fabulous partner and owner, Dom de Luxury, for her continuing inspiration and support.
That's it. I hope this answers your questions and maybe inspires you to do your versions of some of your favorite characters! If you have comments, send the nice ones to me.