My habit of buying cheap costume jewelry has one drawback: they break easily. It's a shame because the stuff I buy (almost all of which is between $3-$10 a piece, mostly less than $5) looks gorgeous and expensive. You can repair most of your damaged jewelry easily in a few minutes. It's so cheap you might wonder why not just replace it? Costume jewelry comes and goes, so you can't always replace a piece you love. I'm always falling in love with the cheap stuff. So I have to repair it or do without.
What you will need.
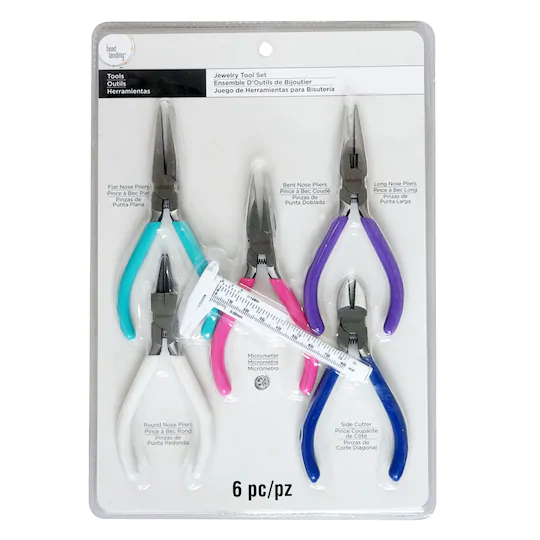 You'll probably spend about $20 to acquire the stuff you need to do simple jewelry repairs. I spent $10 on this set which I found at Michaels. These are probably more tools than you will need and they seem well made to me. You will also need at least some of the following:
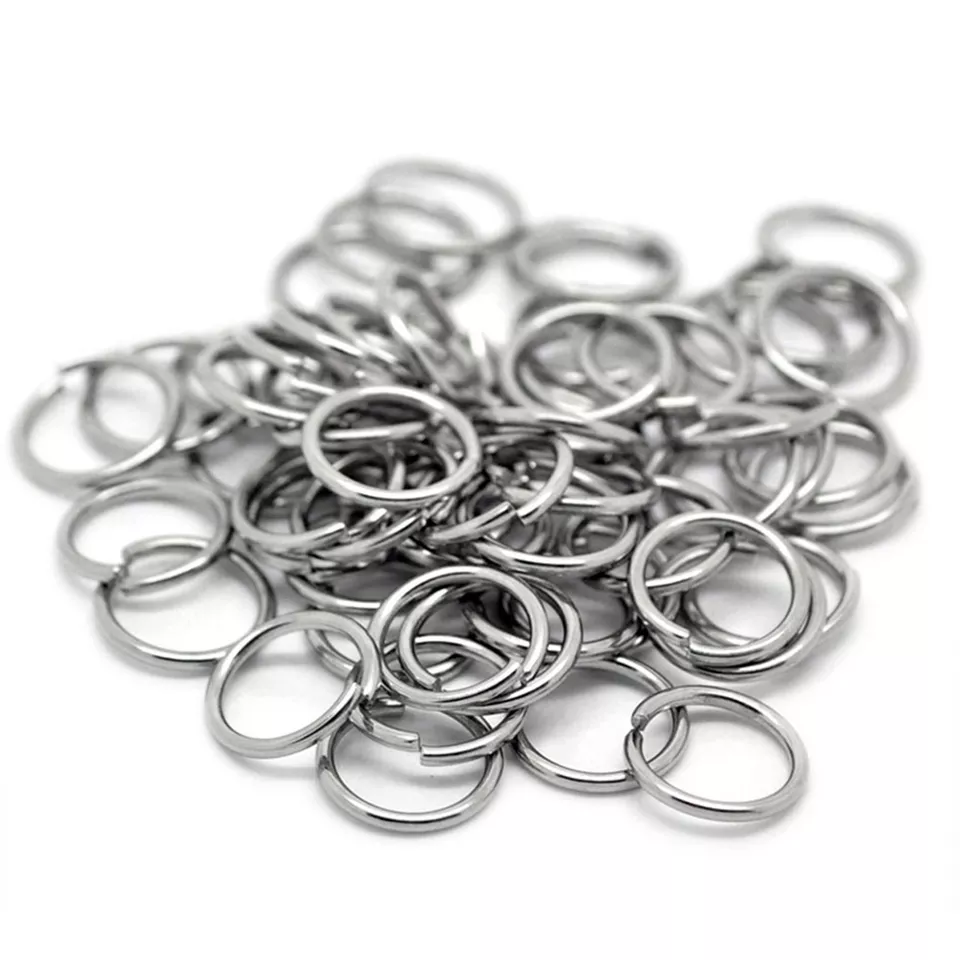
- Jump Rings (assorted sizes and colors).
- Lock Rings (assorted sizes and colors).
- Closures, such as Lobster Claws.
- Bead wire (sometimes called Art Wire).
- Plastic box to keep all this stuff in.
These all come in packs of 60 or 85 or 100 (except the wire, which comes in 65-foot wound lengths). These purchases should last you through several years of jewelry repair, and if you buy everything, including the tools, it will cost you less than 20 USD. If you live in the U.S.A., you can find everything you need at Michael's or another craft store.
Salvage
If you can't repair a piece, you can still use it for salvage. For example, I bought a necklace made of chains and "dangly" bits. It never looked as nice on me as it did in the store. It was a pain to wear because the chains tangled up. So I never wore it, but I didn't throw it out. Instead, I've been using it as a source for replacement chains (chains can be expensive)! In the crazy economics of jewelry, that necklace cost me about 5 USD, but if I bought each chain it contains as a separate item, I would probably have paid $50 or $60! So save your old pieces!
Typical Jewelry Repairs
The most common jewelry damage involves a broken link on a chain, attachment, clasp, or closure. These are very easy to fix. The second most common are gems that fall off. These are also easy to fix, but I never find the lost gem, so I save these for parts.
You can use any of the following procedures to fix necklaces, earrings, or bracelets that have fallen apart.
Using Jump Rings
 Jump rings come in different shapes, but a circle is the most common and useful. You can use these to rejoin links in a broken chain, reattach parts of an earring, or replace a broken clasp with a new one. It's straightforward.
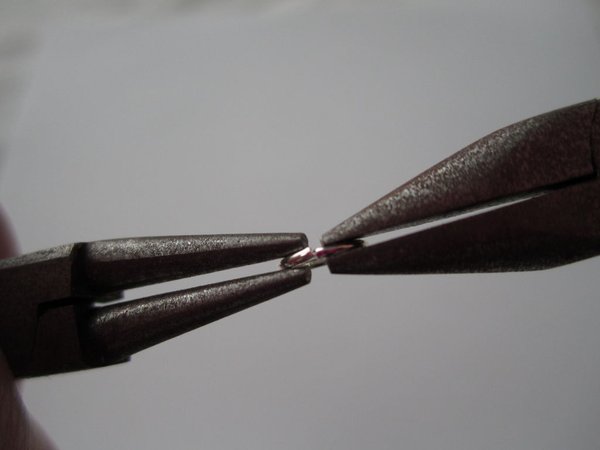 The first step is to open the ring. You need two pliers. Hold the jump ring as shown with both pliers on either side of the opening in the ring. Don't widen the ring; instead, use a twisting motion to move the ends away from each other.
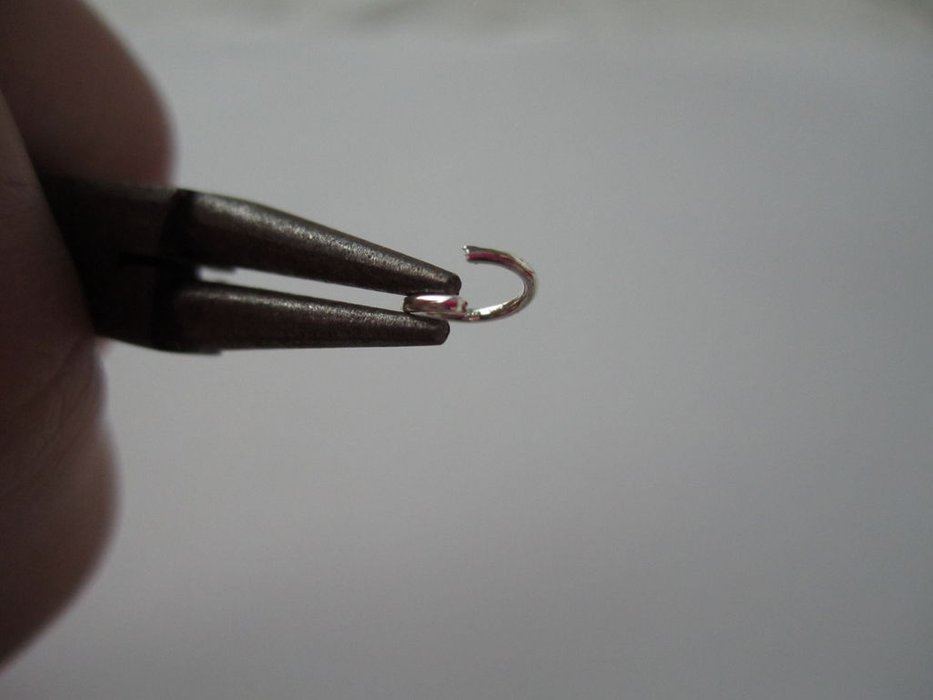 Open the ring as little as necessary (probably much less than shown in the picture), then slide the pieces you want to hook together onto the ring. Finish by using the two pliers to reclose the ring.
If you are repairing a chain, ideally, you will find a jump ring that matches the size and color of the other links of the chain. If you have to choose between color and size, use the same color. In practice, your hair covers most fasteners. If no one is likely to see it and you don't have a match, don't worry about it.
Using Lock Rings
Lock rings work the same as jump rings - you use them to reconnect to previously connected jewelry bits. There are various types; some look like those metal key rings you wind your keys on, while others have a small locking joint. These are far more secure than jump rings but also more expensive and sometimes harder to use. I prefer them because I find lock rings tend to re-open. Use them just as you would jump rings
Using Wire to Roll Your Own
The final option is to use art wire to create a ring. You can customize the size and often get better closure. I use the end of a needle nose plier as a form and wrap the wire around it. Once I have shaped the circle, I use it like any jump ring. It takes a little practice, but I think this gives the best results.
I hope this has been helpful. I'm always happy to get good suggestions and nice comments. If you have some, feel free to get in touch!