More Wig Mis-Adventures
This is here to help you avoid even more wig mistakes. As I mentioned in Part 2, I made lots of mistakes. And depending on the manufacturer, they are not always that helpful. There's a lot of info here. Take your time with it.
Many places sell wig supplies. I always encourage people to support their local businesses, but not every town has a wig maker. My goto is Bobbie Pinz. Bobbie is in my town but has an active mail-order business. He's a wig maker and a stylist, and he's been fantastic to the Trans and Drag community. So I support him. And his prices are fair.
If Bobbie doesn't have what you want, you can try Amazon, but you should also know about Manhattan Wardrobe Supply. MWS is a big outfit that supplies the movie, theater, and opera community. They almost always have everything. They are good people, but their prices are not always the best you can find. My last choice is always Amazon, especially for hair products and makeup.
Wearing a Wig
You don't need much to wear a wig, but a few things help: a wig cap, a way to make sure it stays on your head, and possibly some glue if you are wearing a lace front wig.
If you have a lot of hair, you will want to wear a wig cap, or even if you don't, you will want to wear a wig cap. There are different types; they all work well, are inexpensive, and many wig makers give you one when you purchase a wig. It also keeps your hair out of the way while doing your makeup. You can also use an old pair of pantyhose trimmed down to size.
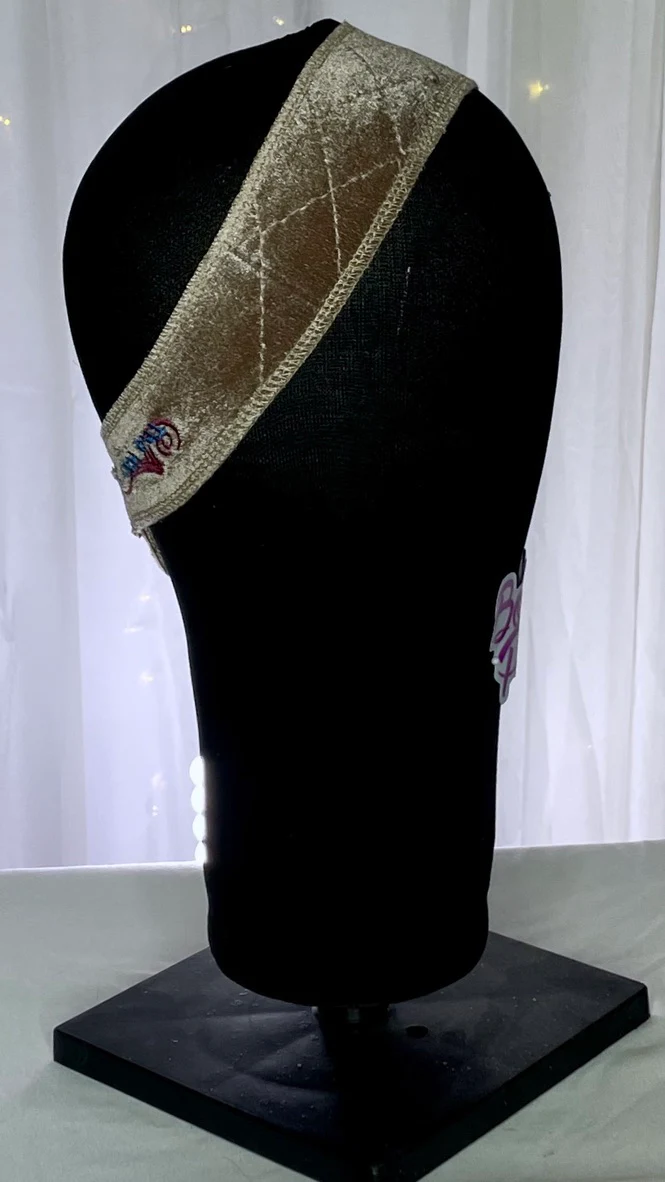 To keep the wig firmly on your head is important. There are many ways to do this, from bobby pins to specialized clips, but my favorite (and the easiest) is using a Hair Grip. The Hair Grip is a fantastic invention that holds your wig securely, even if you dance and bob your hair around! They cost around $20 and are available from Bobbie Pinz, Amazon, or probably, any wig store. I highly recommend them! There is a right and a wrong way to use them, so take a moment to read the directions. It is as secure as any method of attaching a wig I have found and by far the easiest.
All that is required is to place the wig on your head, covering the Hair Grip. Center the wig on your head, then reach back and pull down the back of your wig, so it is over the Hair Grip on the back of your neck. Finally, make any adjustments required to the ear tabs (usually minimal).
If you are putting on a lace front wig, follow the same procedure, but be careful not to pull on the lace! Move the wig by the hair, not the lace! I leave a small line of lace on the front of the wig to help secure it. I use spirit gum to glue it down. I like the Kryolan brand, TV MASTIX Spirit Gum. It looks more natural on the skin and is completely matt.
After You Wear Your Wig
Remove it carefully when you have finished with your wig for the day. If it's a lace-front wig, clean the lace and deodorize the wig, then brush it lightly, just gently on the surface, to restore the styling. If you are new to wigs, you will probably wear the wig as you received it for as long as possible. That's what we all did, and there's nothing wrong with it. Unfortunately, all hairstyles reach the point where a light brushing doesn't work anymore. When your wig reaches this point, you can either pay a professional to restyle your wig or do it yourself. If you are using a pro, you won't need most of what follows and can stop reading here.
Basic Wig Tools
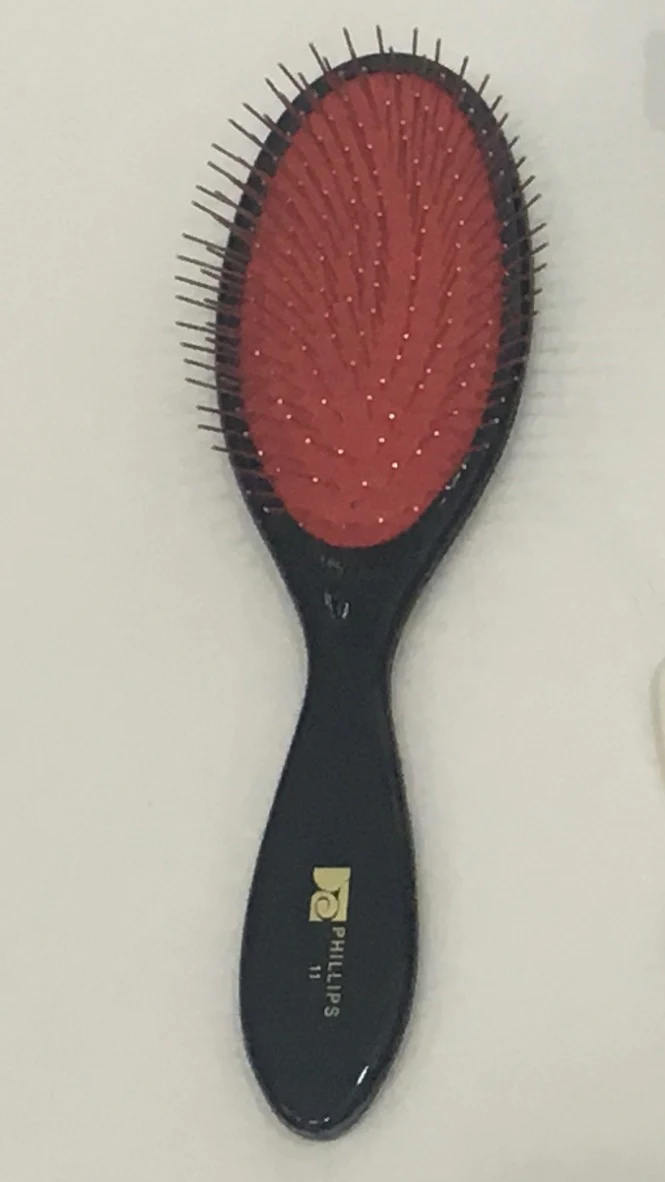 You need a good brush. You need more than one, but the Phillips #11 wig brush will be your workhorse brush for detangling and many styling tasks. You can get one from Bobbie Pinz for $11.50 plus shipping. That's where I bought mine. Amazon carries them for $13.50 with free Prime shipping. They are not hard to find, and they are great to use! As your experience with styling grows, you will undoubtedly add more!
 You need a wig block, which is something like a head that you mount the wig on for styling. The best are made from canvas stuffed with cork. You can get Styrofoam wig heads for $5 or less, but they are horrible for styling and handling wigs. The only use for Styrofoam heads is display or storage. The expense of a canvas block may deter you, but they will last forever properly cared for. Styrofoam wig heads wear out fast, and you need to keep buying them. You will spend far more on Styrofoam heads in the long run than canvas blocks.
Wig blocks come with short and long necks. The heads are sized from 19'' to 24'' in 1/2 inch increments. I prefer the long-neck wig blocks for styling. Wig makers like the short neck blocks for building wigs from scratch.
You want the block to be the same size as your head. It's easy to measure: Take a cloth tape measure and wrap it around your hairline or where you want it to be. You can look in a mirror to make sure you have the tape around the bottom of your hairline in the back of the neck. If you have a receding hairline, place the tape where your hair used to be. Women have smaller foreheads than men, so if you want to wear your wig lower on your forehead to imitate that (as I do), measure from where you want your hairline to be. That's all there is to it.
Any wig supply store carries them. I own two long neck blocks which I bought from Bobbie Pinz and one short neck wig block which I bought from GEX on Amazon. All of them are of excellent quality. The GEX is surprisingly inexpensive, but GEX doesn't offer long-neck wig blocks.
Before using your wig block, it's a good idea to cover it with a protective coating. During wig work, you use oil spray, hair spray, alcohol, and steam, which will soak into the block and shorten its life. So protect your investment. It's easy to do with a large plastic bag and some packing tape. Then use a hair dryer to seal the deal. I plan to make a video on how to do this at some point, but it's not difficult and lasts a long time.
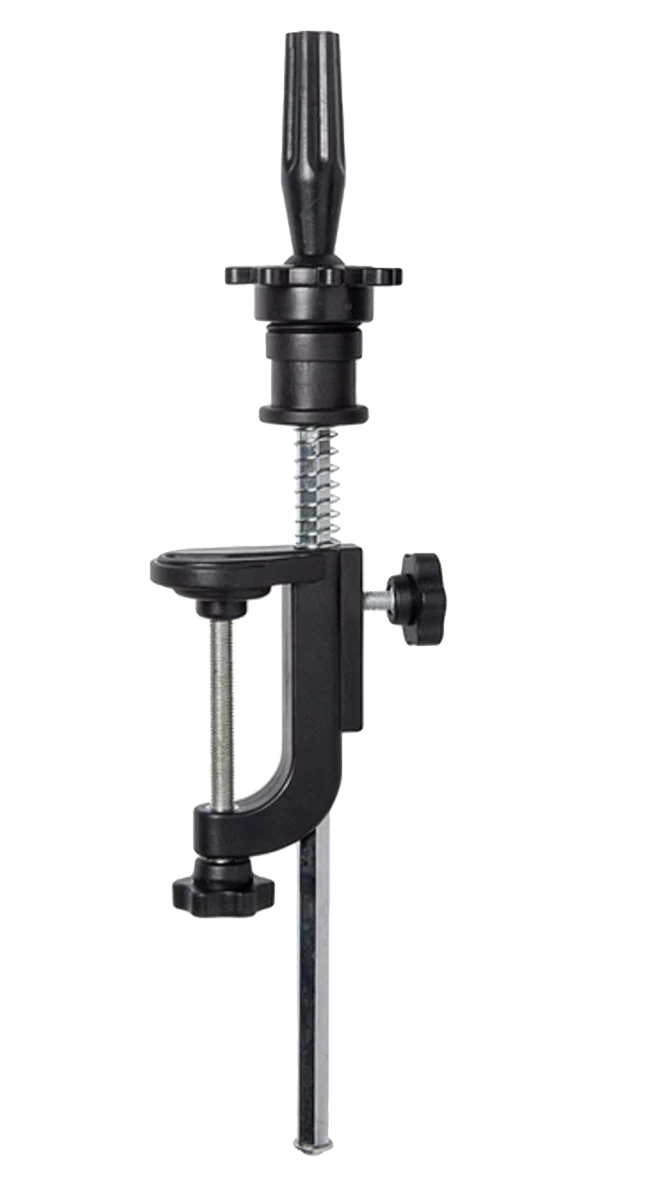 You will need something to put your wig block on. If you have a workshop with a vice, you can use the handle of a broom or a large rod and clamp it in the vice. I've tried quite a few things. My favorite is a mannequin clamp that attaches to a table. I bought mine from Bobbie Pinz for $45. I've seen similar things elsewhere for more money.
Tripod wig stands are popular, and I have one which I use for videotaping or demonstrations. I don't like it for styling because it tends to fall over, making it awkward to use. All tripod stands have this problem. Many of them are outrageously priced. I have one I bought used on eBay. Amazon currently has many listed; some have metal foot holders that you can use to stabilize the stand while working on your wig. I don't have any specific recommendations other than to say I don't enjoy using tripods for styling.
There are also suction-cup wig stand holders. I have tried these, but they didn't work for me. I couldn't get the suction cups to hold onto any of the surfaces in my home, so I would rate this even lower than the tripod for styling work. But I do know people who are happy with them.
You will need some large Pearl Head Pins for attaching your wig to the block. You may see T-Pins recommended for this, but I hate them. The hairs of the wig get caught in the "T," and you spend more time struggling with the pins than styling the wig. You can find large pearl head pins at most high-end sewing shops or get them from Bobbie Pinz. A box of these will last a long time. To fasten the cap to the block, I use large blocking pins, also available from high-end sewing shops or Bobbie Pinz.
If you are working on a lace front wig, you will need some smaller pins, also available from high-end sewing shops or Bobbie Pinz, and an elastic waistband or some cotton-twill.
Finally, you need an oil-based spray. That will be your best friend for detangling and combing out wigs. I use Motions. It is light and evaporates a few hours after you use it. Do not buy sprays labeled "Olive Oil." These are way too heavy and greasy for a synthetic hair wig. The only place I have found it is on on Amazon
Alligator clips are the best for clamping hair out of the way. You can get them from Bobbie Pinz for $6.75.
Blocking Your Wig
It's easiest to see this done. I will make a video someday. Until then, here's how to block a wig. The first steps are the same for both lace and hard front wigs:
- Wig blocks have a front and a back. The front is flatter than the back. You will notice a seam down the middle of the front and one on each side. These side seams give the (rough) position of your eyes (or your client's eyes).
- Before placing the wig on the block, you can face the wig block or stand centered behind it and look into a mirror. Do whichever works best for you. Center the wig on the head, and don't put it too far forward or too far back. Put it on just as you would wear it.
- Put a pearl-head pin right in the center of the top of the wig block, then place two more, one to the right and one to the left of the center pin, an inch or two away from it. These are temporary to hold the wig in place while you block it.
- There are disagreements about what to do next: I take two pearl head pins, stretch the back of the wig down, just as you would when you wear it, and pin the lower back of the wig. Put the pins in so they point upwards and slightly towards the center of the wig. That will keep them from pulling out. Some people do this step after they block the front of the wig. But when a person puts on a wig, they usually put it on their head, center it, then pull the back of the wig down. After that, they will make fine adjustments to the front. I think pinning down the back later will make the wig look different on the block than it does on the wearer, which is not the best idea. Do what works for you.
At this point (or a bit before, if you pin the back down later), the methods for blocking hard and lace front wigs diverge. If you have a hard front wig, proceed as follows:
- Do any minor adjustments to the front of the hairline, making sure it's where you want it, then place a large blocking pin (not a pearl head pin, but the large blocking pins) just behind the hairline, right in the center.
- Add one large pin at both ear tabs.
- Locate the place where the wefting from the side meets the top portion or "crown" of the wig. Place another large blocking pin in the front hairline, just where this meeting occurs.
And that's all there is to it for hard front wigs! Every wig is a little different, so you might want to add another pin here or there. Feel free to do that as you work on your wig, if you think it makes things easier for you.
Continuing with a lace front wig.
Finishing the blocking of a lace-front wig is more complicated. I found a very nice video from a woman who deserves many more followers. She also talks about how to unblock the wig:
Make sure you give her video a like and some love.
Combing Out your Wig
Now that your wig is blocked, you can comb it out. It is easier to see this done, and someday I will make a video. Until then:
- Separate the hair into sections along the wefting. I like to start around the ear. YOu can use the tail of a rat-tail comb to make nice, clean horizontal sections, twist the hair around itself and secure it with an alligator clip, then place it on top of the wig block.
- Go down 3 or 4 wefts and make another section. Pile it on top of the previous section (on the top of the wig).
- Continue doing this until one final section hangs from the wig (typically 3 or 4 sections down). That's the section closest to the neck and is usually the most tangled.
- Spray the hair in the section liberally with the oil sheen, then start to comb. The rules for combing a wig are:
- Always start from the ends of the hair. Starting from the base of the hair will turn any potential tangles into impossible knots.
- If there is a tangle, gently use your hands and fingers to undo it. Try spreading the hair from side to side rather than pulling it up and down.
- Start by holding the brush vertically so the handle points in the same direction as the hair. That will detangle the hair better. When the vertical brush goes through the hair smoothly, brush normally.
- When the brush moves easily through the hair, and there are no tangles, move to the next section and continue until done.
- Remove the pins, saving them for the future, and put the wig away.
Completely Useless Products
They sell specialty products for detangling wigs. Things like conditioners and detangling liquids that you are supposed to soak the wig in. I tried them, but they didn't work for me. Conditioners are probably a good idea for a human hair wig, but synthetics do not absorb anything, so they are pretty pointless. Don't waste your money on this stuff. You can experiment with fabric softener if you want to condition a synthetic hair wig. That works for me and is much less money.
That's it! I hope you found this helpful. Thanks for reading, and if you have something nice to say or a good idea or suggestion, feel free to send me a message. I always love hearing from you!