SheDaddy and I adore Harley Quinn. One of our private activities is creating Harley-Mods, little stories where we create fantasies for each other. I am Pammy Quinn, a Harley Quinnesque character who protects and serves SheDaddy. SheDaddy is always the powerful, important one, intent on reordering the world to make men more obedient to women and women more feminine. Not that different from her character in real life, now that I think of it. We have fun with it. And the stories are always sexy and turn us both on. Win. Win.
So why did it take so long for me to do a Harley Quinn cosplay for one of our dates? Truthfully, I was too fat to do her justice. Harley doesn't wear a corset, and she does show some tummy. I wasn't about to do a gross version of such an amazing female character! It took the pandemic and lots of discipline, but I got to a reasonably Harley-sized body in time for our reunion date! It was an epic reunion, and many of you have written so many nice things about the photoshoot. Thank you so much!
The two big pieces I had to create for the look were the top and the boots. Both were pretty challenging, especially the boots. I was able to purchase the rest of it (wig, choker, panties). This article is about the top and accessories. The boots are complicated and deserve their own piece.
Making the Top
I love cosplay and making stuff, but I'm also lazy. If I can buy something that looks great off the rack, that's my first choice. My second choice is to buy something and mod it into a usable shape. Unfortunately, none of the commercial Harley Quinn tops capture her character. Harley is a messy, tough, bad girl, and the tops all look super clean, neat, and, worst of all, manufactured by a corporation. That's not Harley Quinn. I've seen some vids where cosplayers try to make the commercial tops more Harleyesque by stomping on them in the dirt or otherwise "aging" them. I didn't find it convincing. If you study the actual top from the Suicide Squad film, you see rips, tears, uneven colorings, fades, and poorly done sewing repairs. That adds so much character to the top; the only way to get this is to make it yourself. The good news is that making something that looks like Harley isn't that hard!
What you need
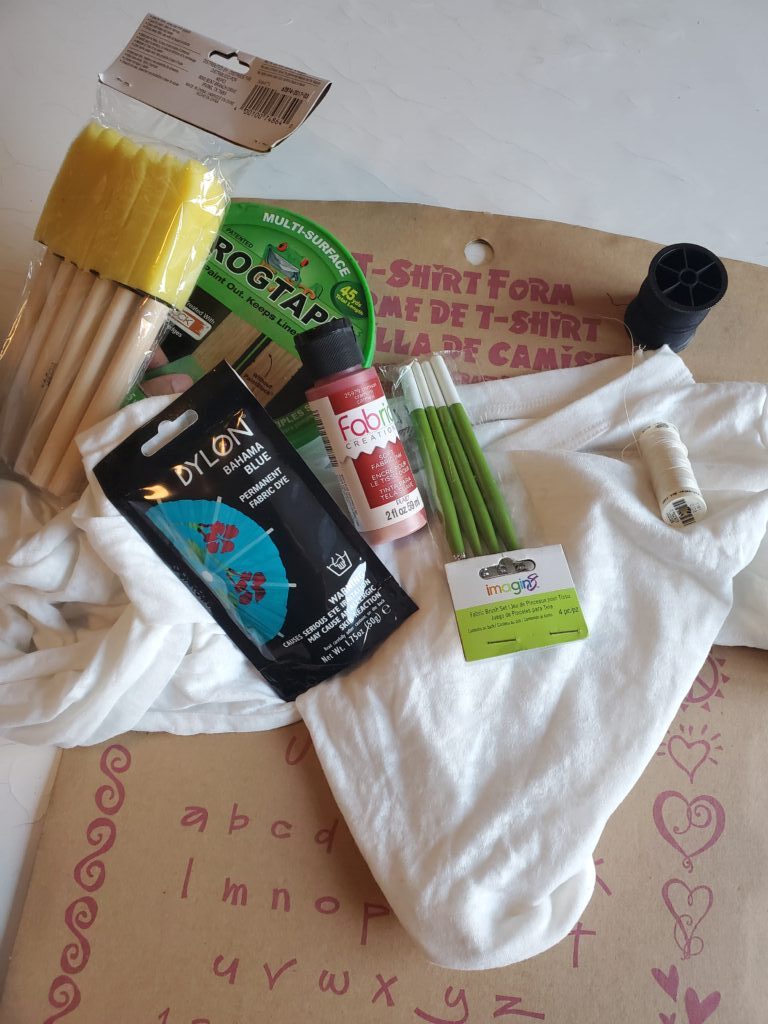
Here's a list:
- A long-sleeve, white burn-out shirt.
- Transfer paper for light fabric
- An inkjet printer (for the transfer)
- A t-shirt cardboard
- Blue Fabric Dye in Bahama Blue
- Fabric Ink in Crimson.
- Embroidery thread in black.
- Embroidery thread in white.
- Painter's Tape
- Assorted brushes and sponge brushes.
- Needles, scissors, chalk or magic marker, etc.
- Reference photos of the Harley T-Shirt. There are plenty, have them handy so that you can look at them!
Here's a picture of the stuff I used:
Trim the shirt
Put on the shirt and put a mark just below the elbow on one arm. The shirt I used tended to shrink a bit as I worked on it, so mark it slightly lower than you think you need. Take the shirt off and cut off the sleeve, then use that to cut a matching length on the second sleeve.
Next, cut off the collar. Don't make it "tidy," and be careful not to cut off too much. It's not a lo-cut T-shirt. Also, remove the label from the manufacturer. That's not Harley. We need to trim the bottom, but that's best left until we have finished the top painting and logo.
Red Paint
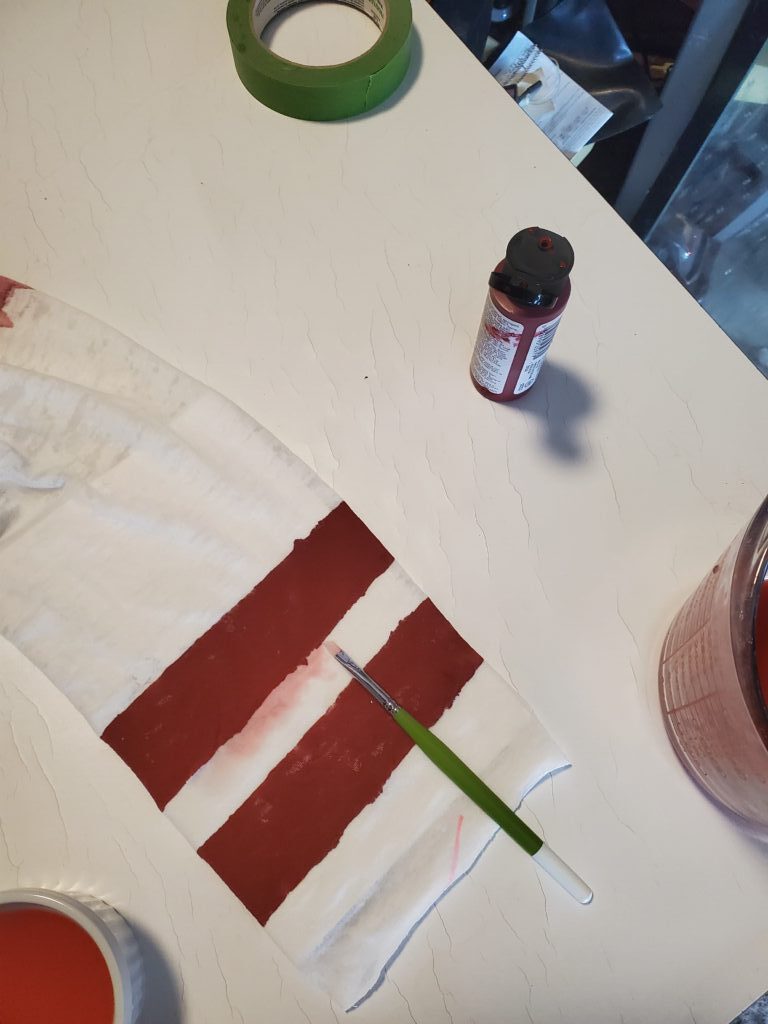
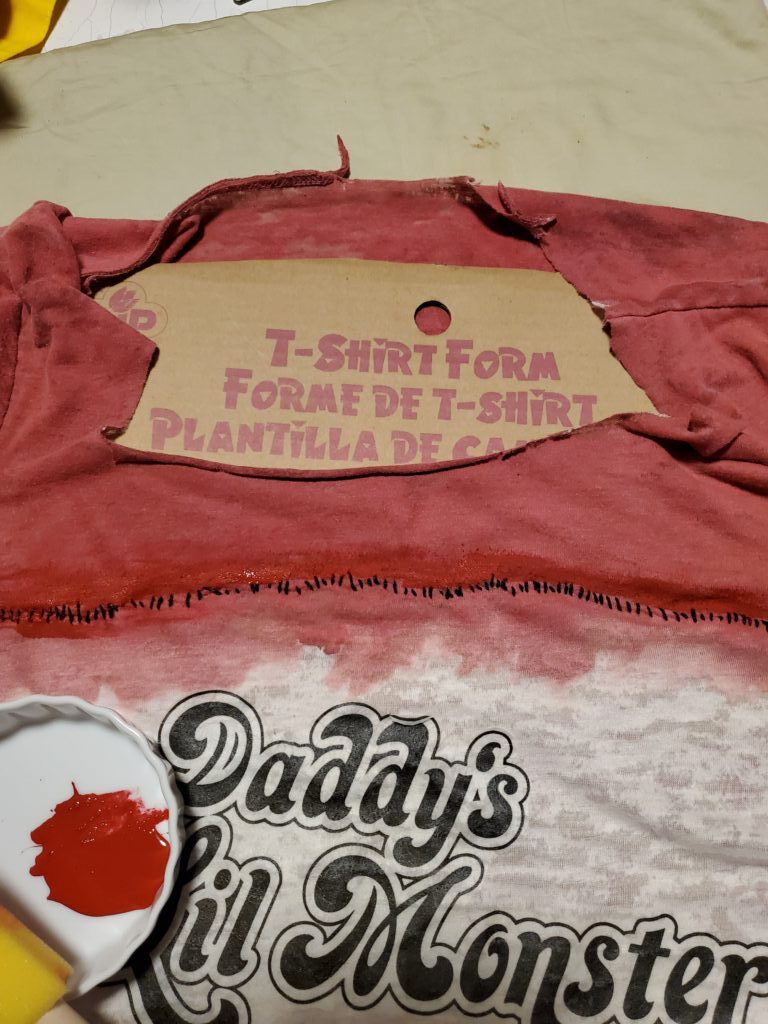
Put the cardboard inside the t-shirt. Take the crimson fabric ink. It's pretty thick, so you must dilute it with water. Don't overdo it - just a small amount! Test it on the pieces you cut from the sleeve.
Mark a spot about two inches below the neck in the center of the t-shirt, then apply the paint. I suggest using one of the sponge brushes. They are easier on the fabric, and the paint goes on better. It shouldn't look "clean," and the line should be a little ragged. Imperfections are good! Something like this:
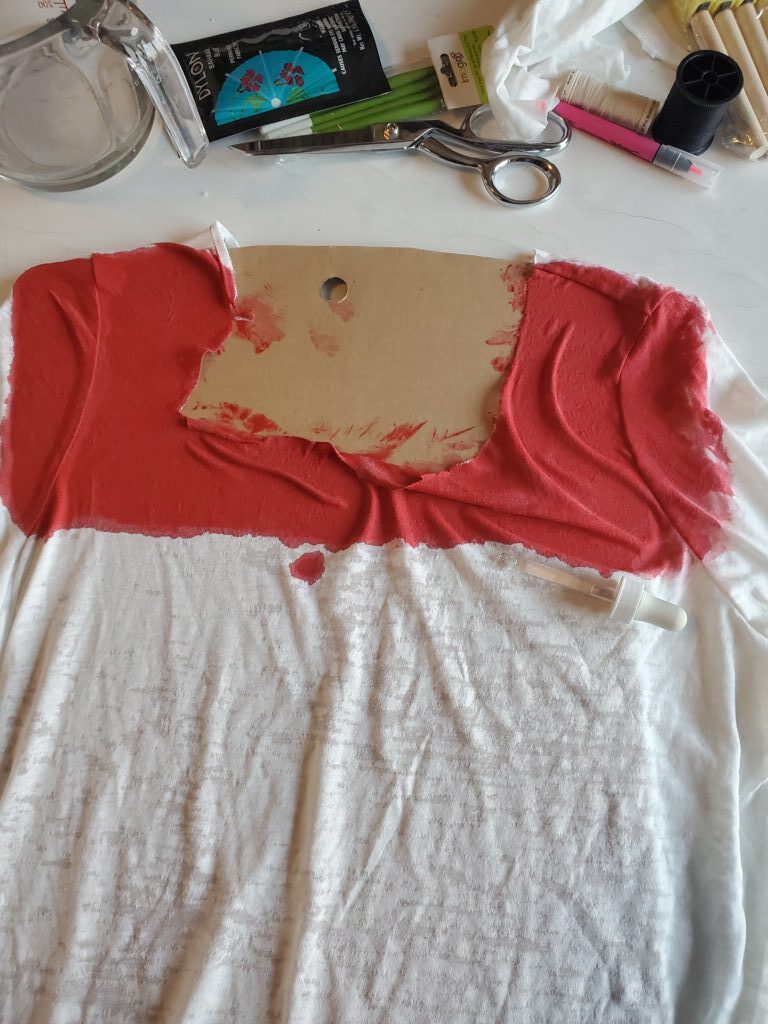
Notice the eyedropper? You will use that next. Fill it with some water, then drip it lightly along the edges of the red. If you look closely at the reference photos from the movie, the edges are blurred like this, not clean. You can also use the sponge brush to encourage blurring. Here's how mine looked - I was happy with it:
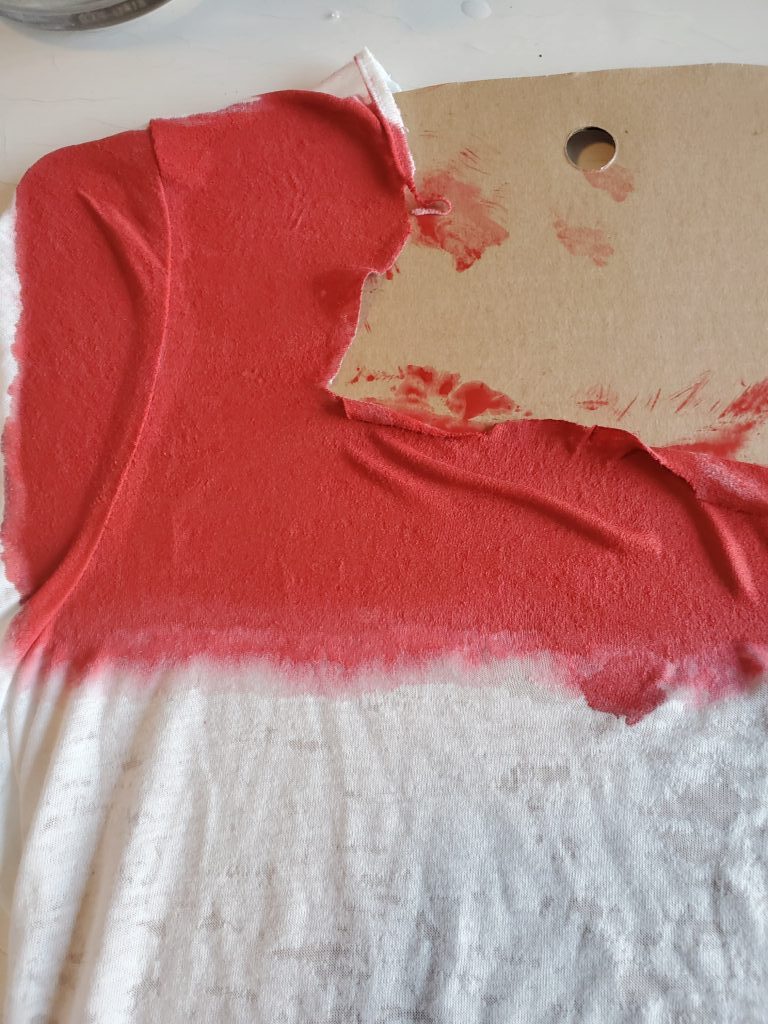
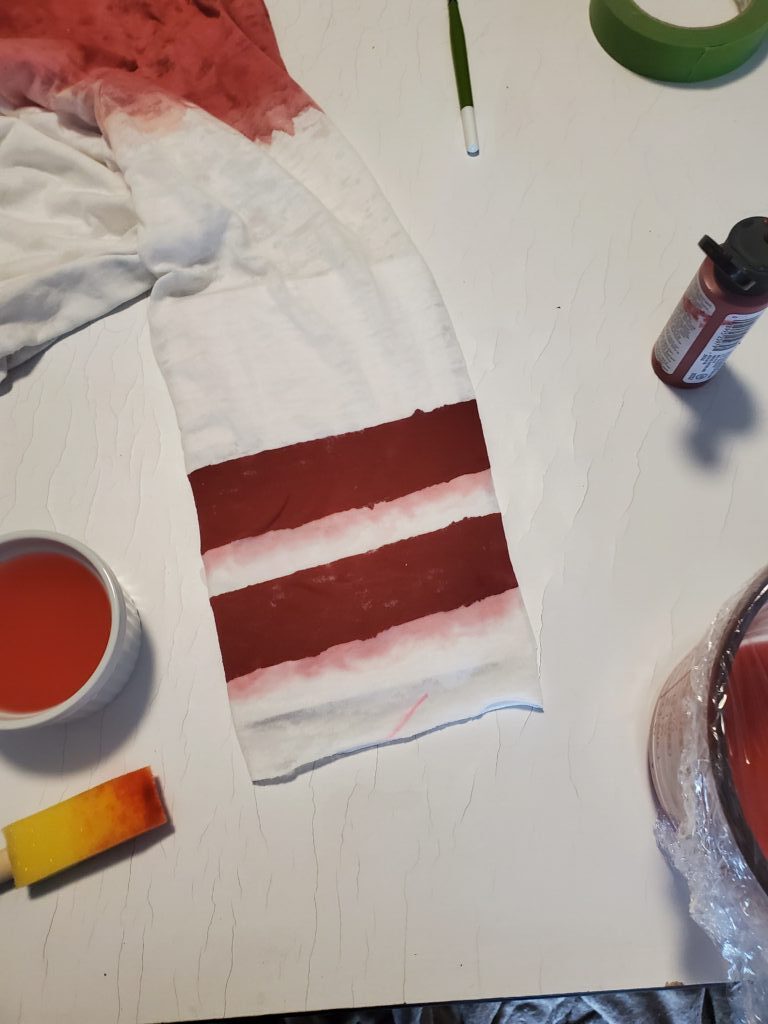
Do the same blurring on the sleeve edges, let it dry, then repeat the process on the back of the shirt.
With this messy red, it already looks better than the manufactured shirts with their nice, clean machined lines!
Blue on Left Sleeve
There's a nice ombre blue on the left sleeve. Mix the blue dye according to the manufacturer's directions. The stuff I used required water and salt! You will also need a bowl of clean water. To create the ombre, dip the very edge of the shirt sleeve (remember, only the left one!) into the dye:
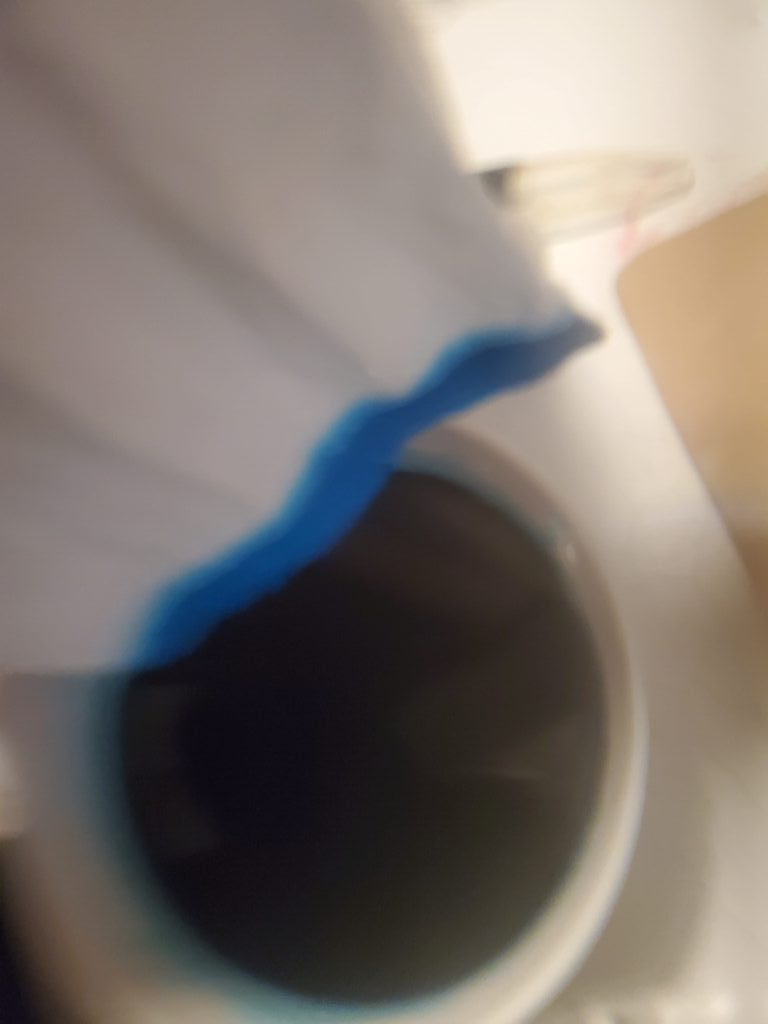
Then dip that into the clean water to ombre it up a bit onto the sleeve:
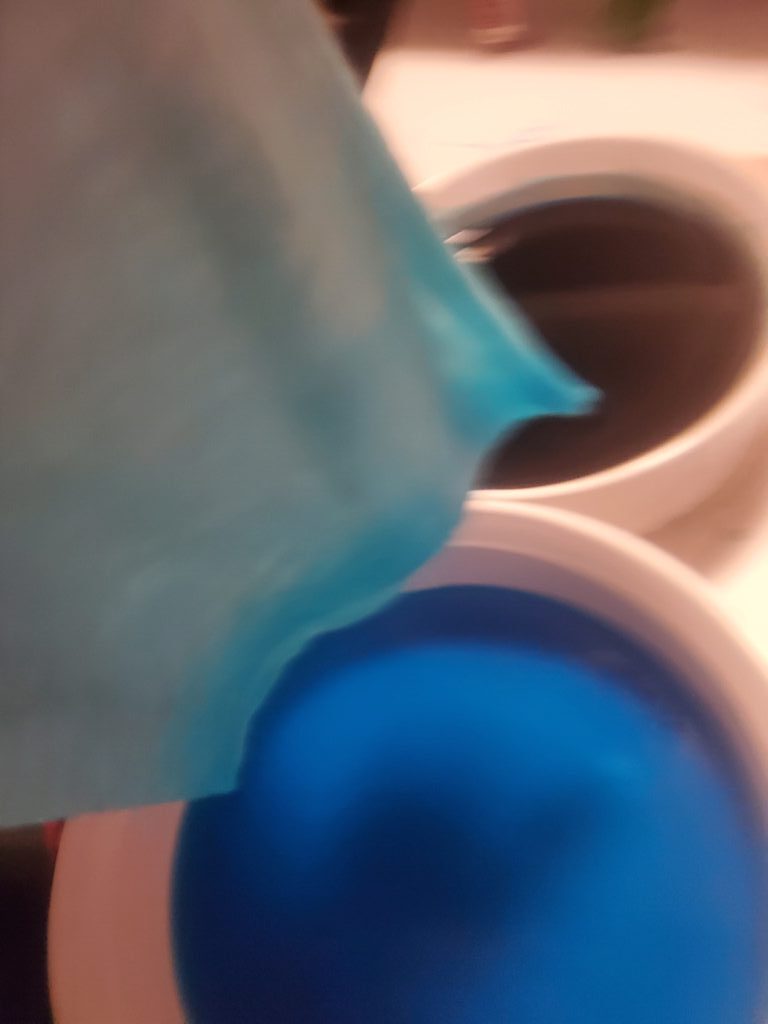
That water looks slightly blue, but it started clean. Repeat this until you get a nice ombre a few inches up the sleeve. Let it dry before you continue.
Red Stripes
I used the same crimson red paint for the stripes, but I did not dilute it because the red stripes in the reference photo look stronger than the collar paint. Do your best here; it doesn't matter if it's not the same as the film. I used painter's tape and used its width for the white stripes. I measured about 1 inch up from the sleeve bottom to the start of the first stripe, and 1.5 inches between the painter's tape lines:
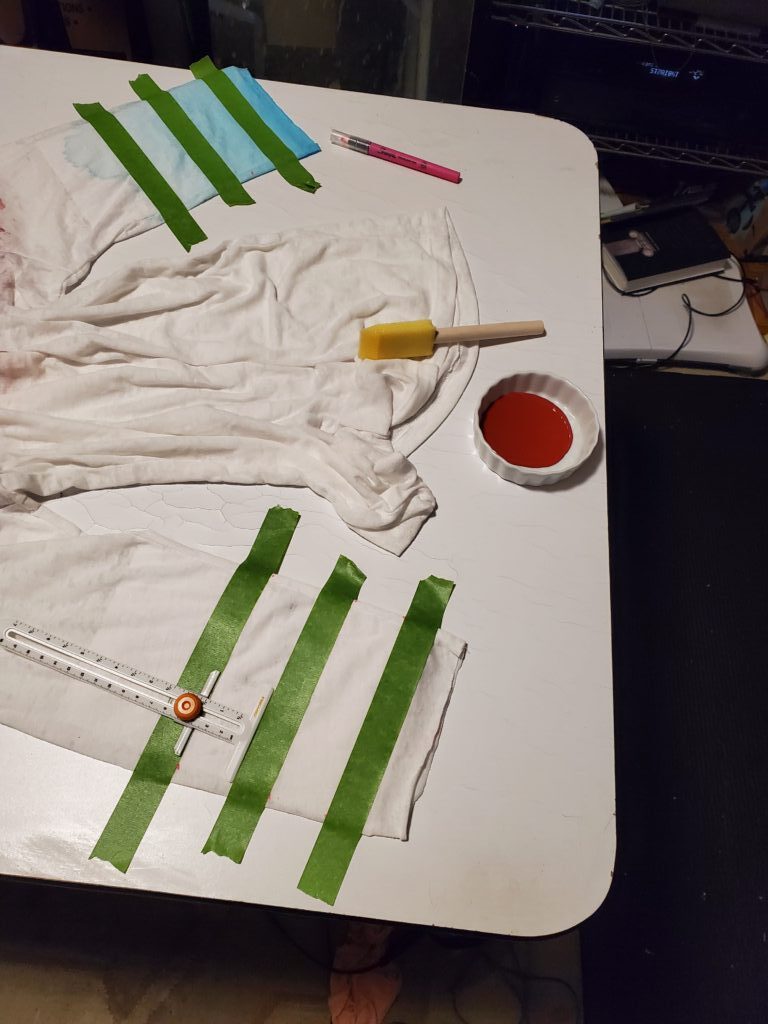
Before you put on the tape, it's important to put something inside the sleeves so the paint doesn't bleed from front to back! I didn't do this and had to buy a new shirt and start all over. I used a few sheets of folded printer paper - if you look closely, you can see the edge of it in the sleeve a couple of inches above the top tape.
Then paint with the sponge brush:
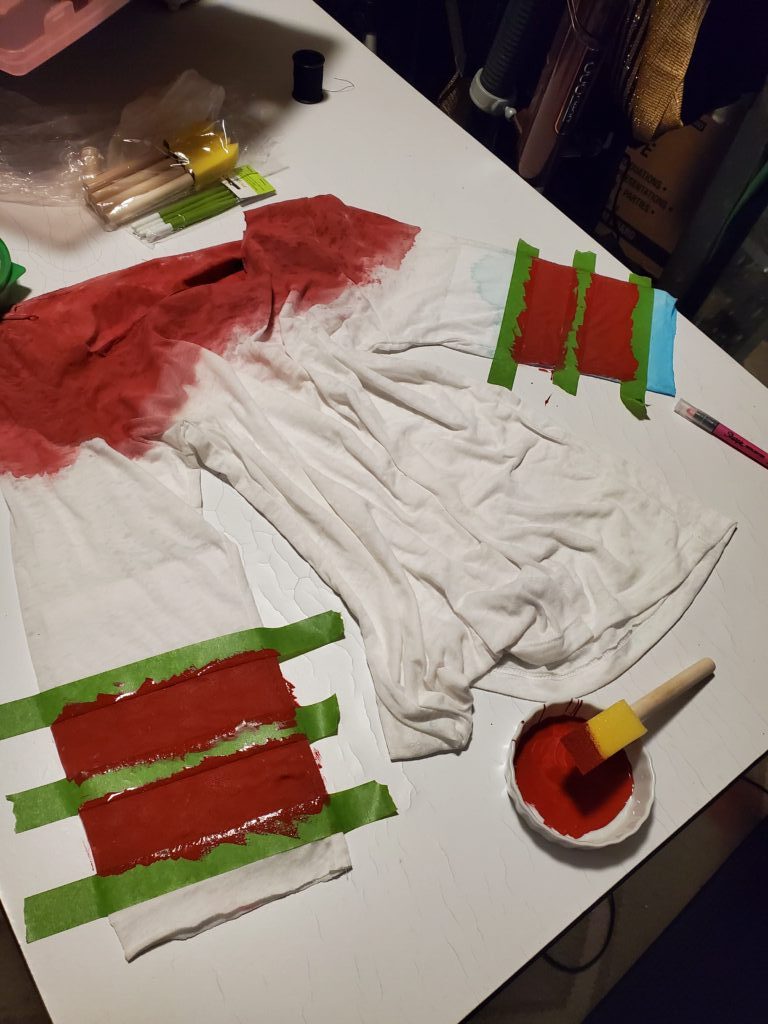
Let this dry for at least an hour, then repeat the painting on the other side of the sleeve. Match the lines as precisely as you can.
Smudge right sleeve
Harley's right sleeve has some smudges. Take a small dab of crimson paint - I used this much:
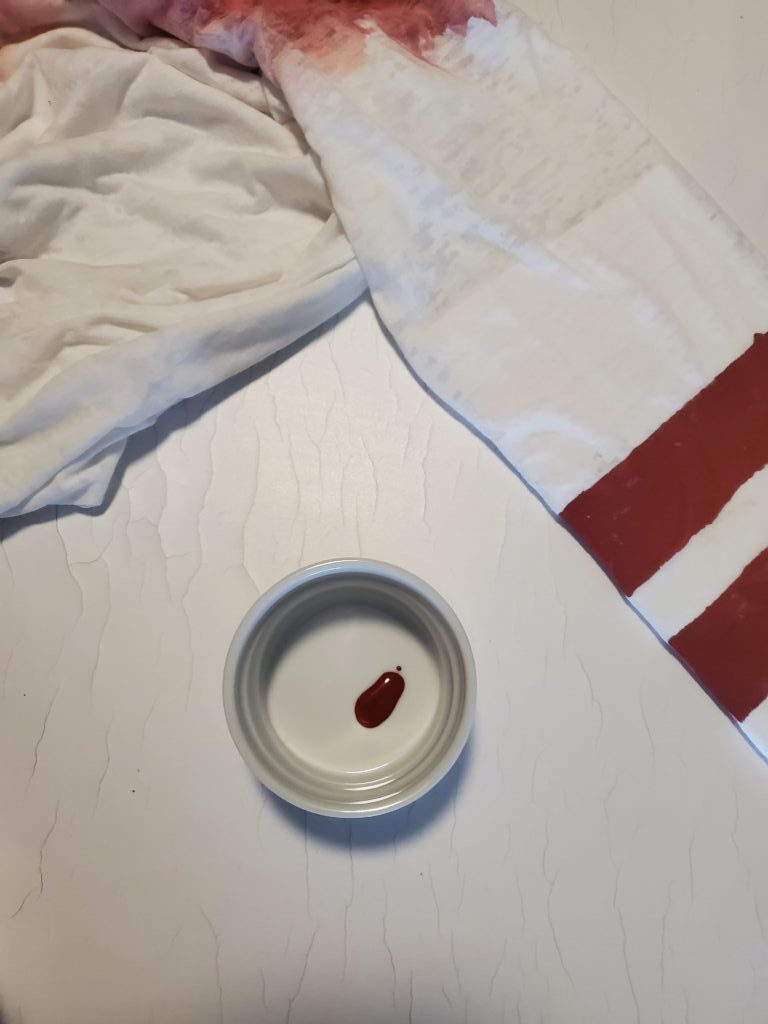
And super dilute it with water. Then use one of the synthetic hair brushes to smudge the end. Here's an in-progress shot:
And here's the final look:
Remember - only do this to the right sleeve, and don't forget to smudge both front and back!
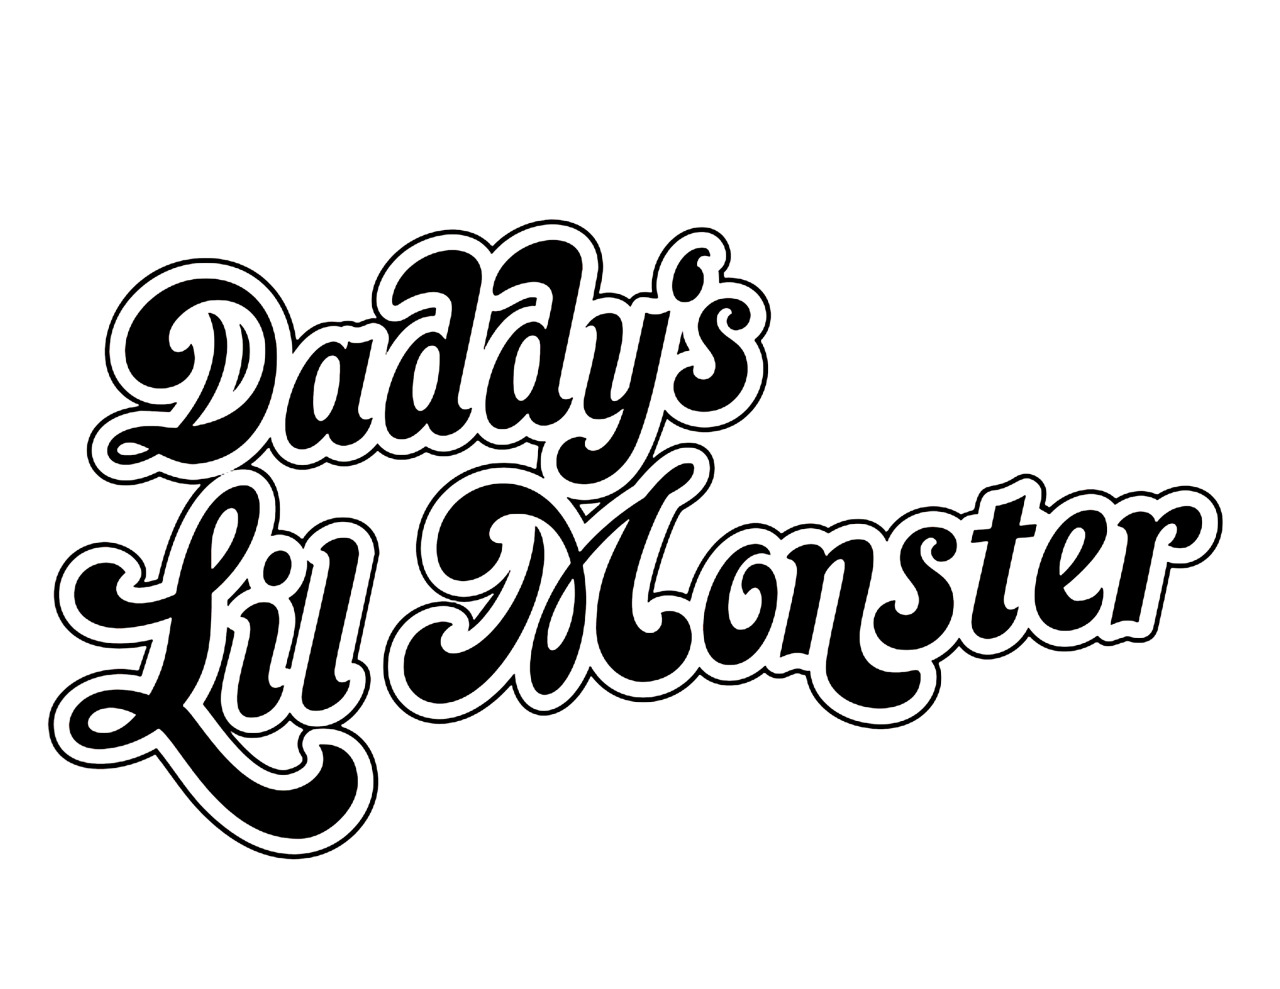
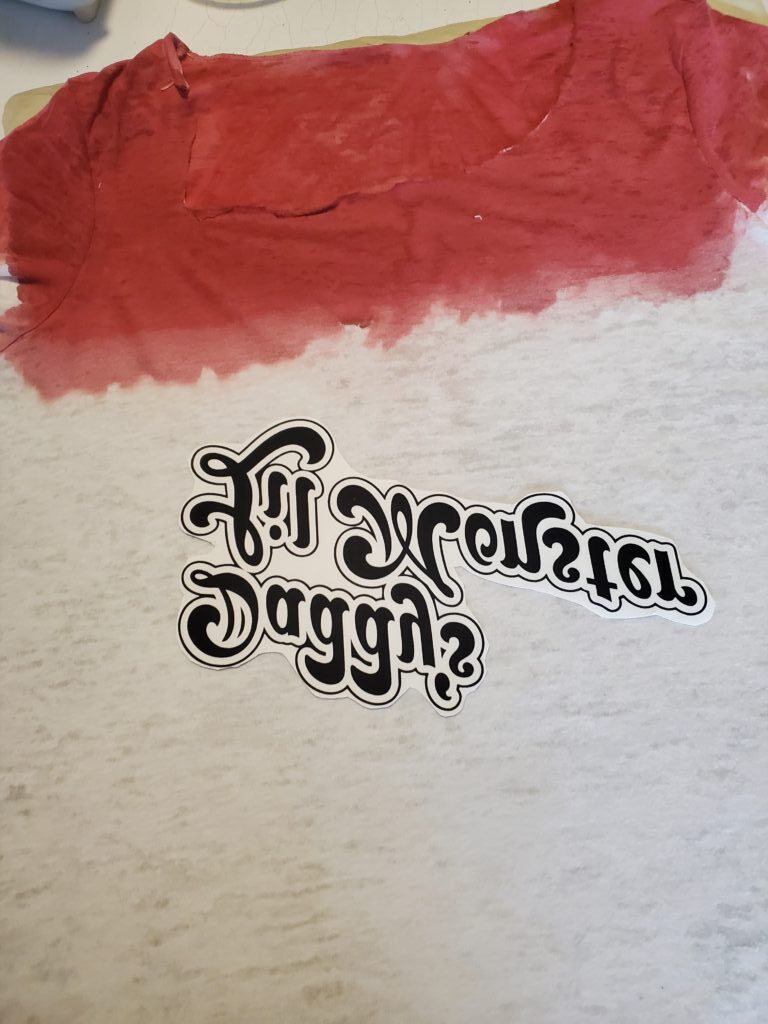
Daddy's Little Monster Logo
Now for the logo. The first thing you will need is access to an inkjet printer. If you don't have one, one of your friends can help you. There are commercial places (like Kinko's) where I am sure you can find some friendly Harley Quinn fans to help you with your project. Laser printers, as cool as they are, will not work. Do not even try.
Then you will need some transfer paper. I used the Avery brand. These come in two flavors, light and dark. You will need the light transfer paper.
Now you need a logo. You can download the one I created by clicking here. Here's the tricky bit: You will turn this upside down and iron it on the shirt from the back. That means you need to print it in reverse. Some inkjet printers have paper settings for light and dark t-shirt transfer papers. If you have one of those printers, use that paper setting, and the printer will take care of the rest. If your printer doesn't have that, you will need to reverse the logo with a paint program before you print it out. Here's how it should look:
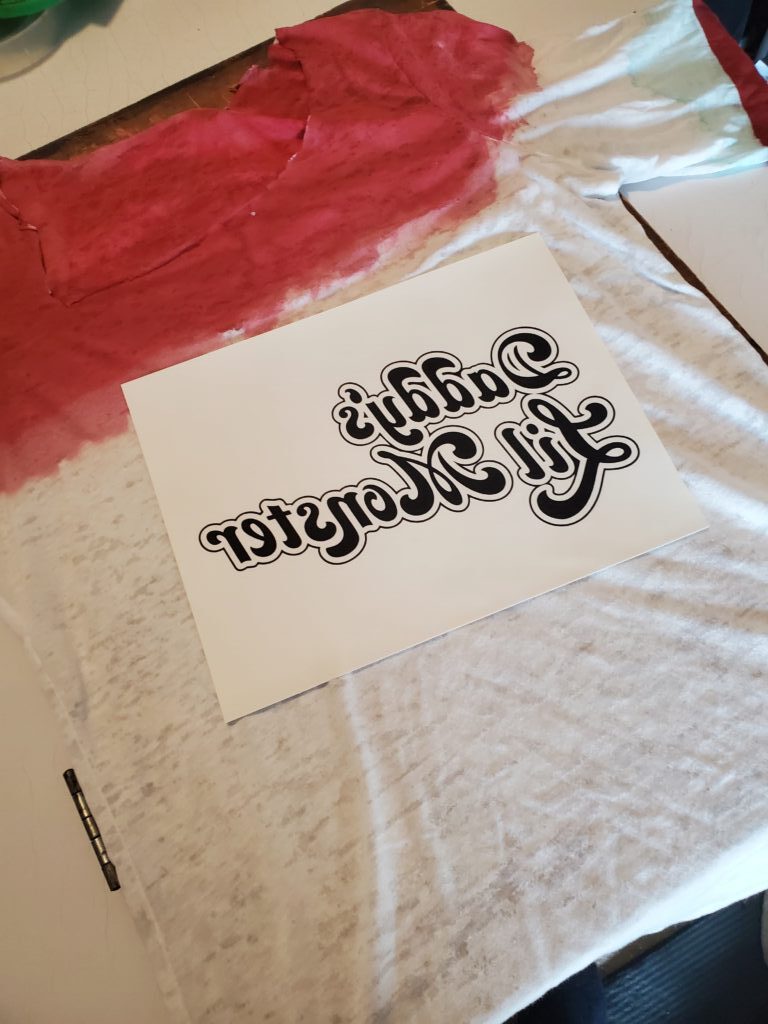
You want to trim the excess paper around the logo - get as close as you can to the printing without actually cutting any of the lines:
Now, follow the directions on the transfer paper. Iron the shirt until it is smooth. Set the iron to the settings recommended by the manufacturer of your transfer paper. Place the paper with the ink against the shirt, with the paper backing visible. Vertically, it should look just as you expect, with the "Daddy" in "Daddy's little monster" on top, close to the red collar paint. Center the logo as best you can, then iron it on until the backing comes off easily. It should look something like this:
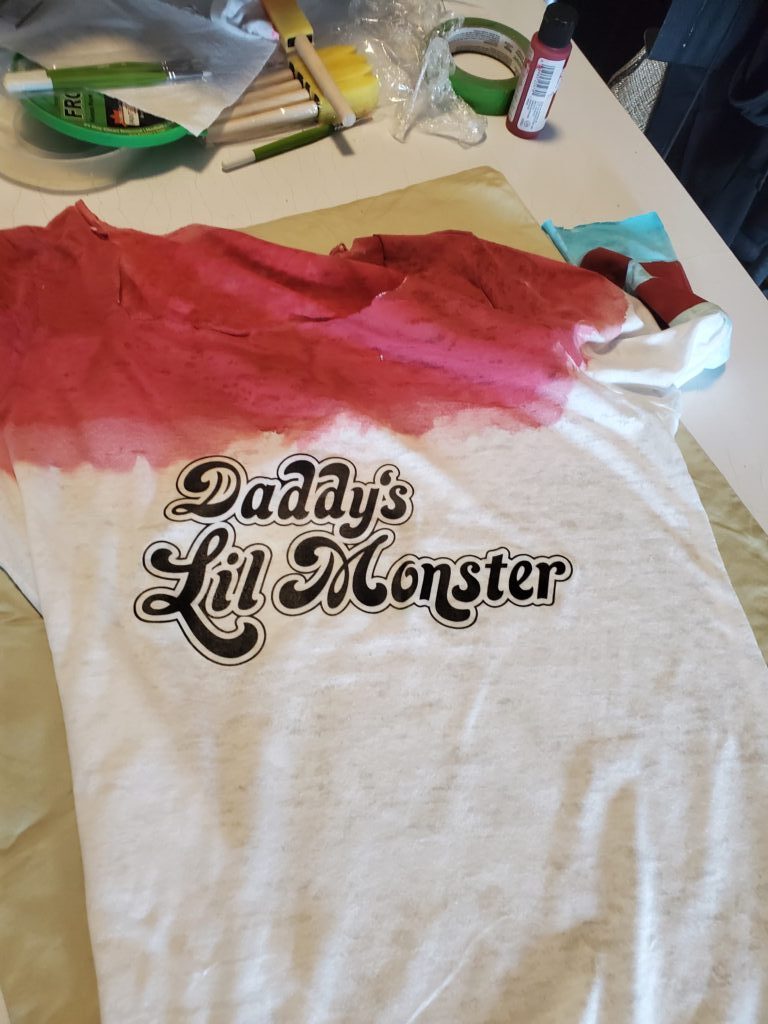
Looking good, right?
More Cutting
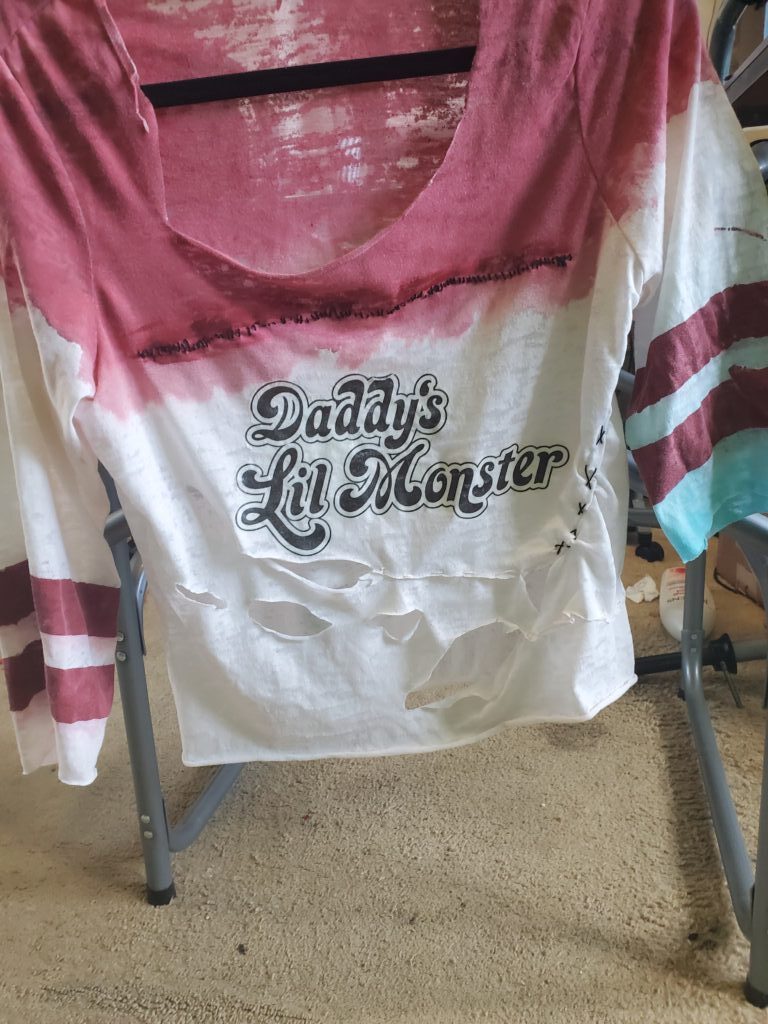
Now that we have the red collar paint and logo, we must trim the shirt length. Put on the shirt again and mark where your belly button will be. Cut the shirt straight across a bit below that. Harley's shirt is not a crop top; it just shows a little tummy. You will be cutting a hole for the belly button, so leave room for that.
Now cut the holes in the shirt. There should be one for the belly button and a few more along the bottom of the logo and the side. Look closely at your reference photo. There should be seven large holes. I didn't photograph this stage, but here's a shot of the finished shirt. I think it's easier to visualize this way:
Sewing
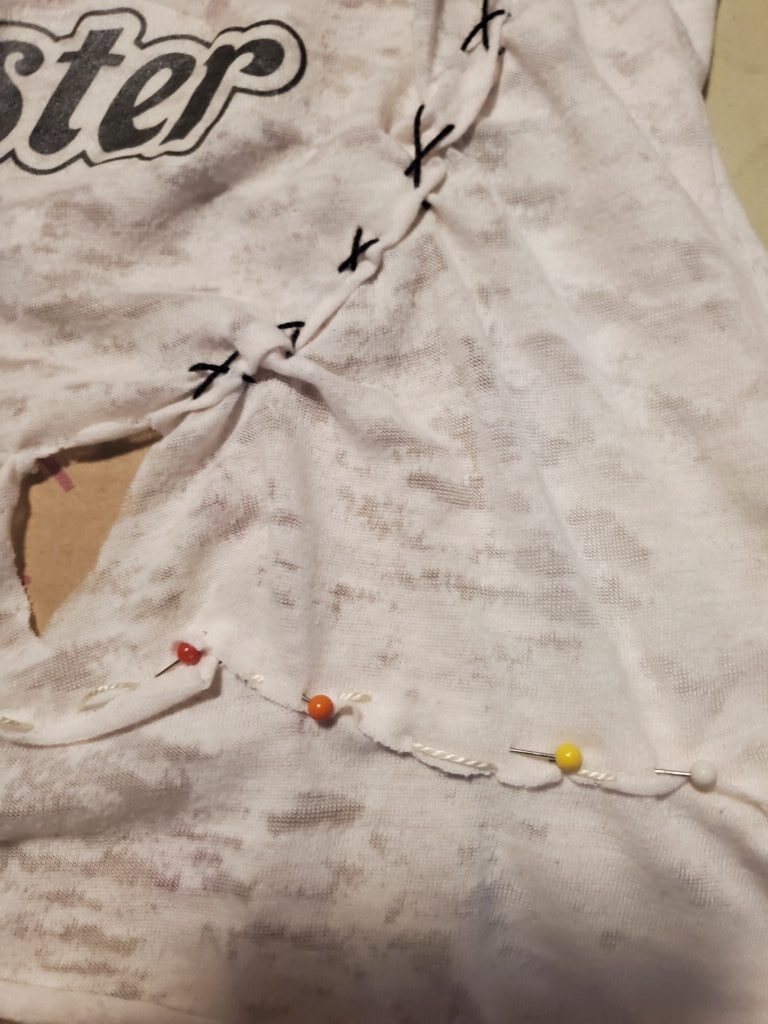
Now some simple sewing. Harley's shirt has a simple run of stitches across the top. They aren't sewing anything together. They are just decorative. It's a Fell stitch, similar to a running stitch, but you go vertically with the stitches rather than straight. Don't try to make it too even or pretty. That's not Harley!
When you've finished, dab some more crimson ink with a sponge right on top of the stitch:
Now pin a small section of cloth in a line from the left armpit to the first hole:
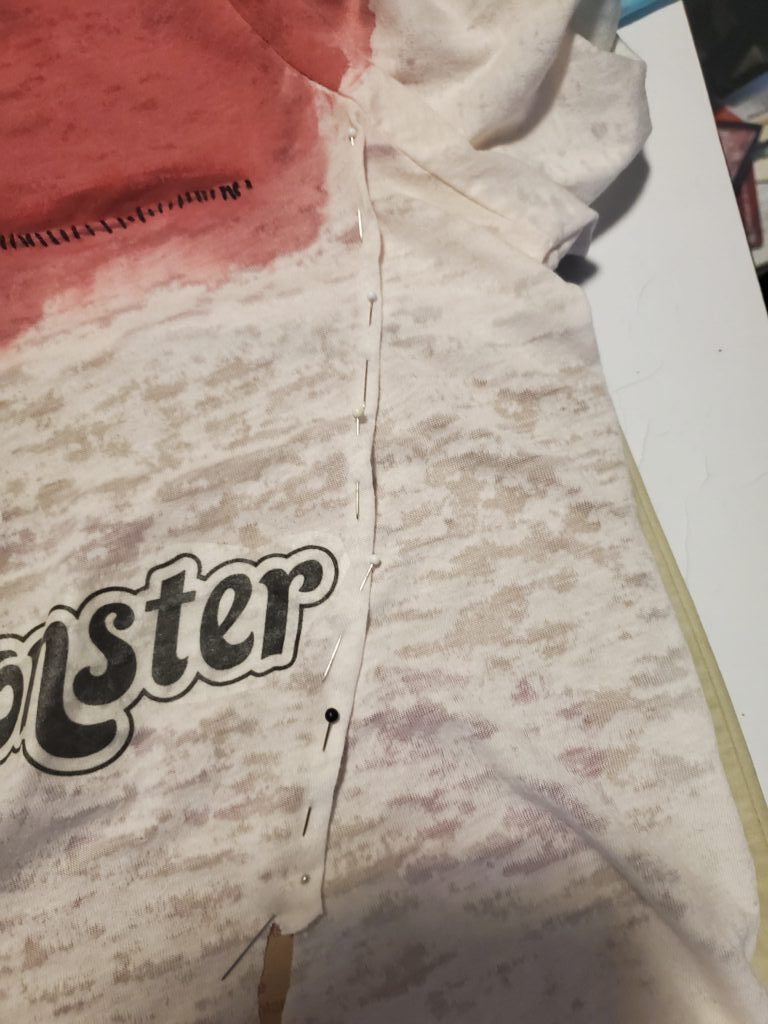
You don't need to cut this; pin it. Then, using the same black thread, cross stretch down from the armpit to the hole.
Now, cut from the hole to the left almost to the small hole where the cross stitching you just did finishes. Then pin that over like you're going to repair it. Here's a picture:
Now use the white thread and a running stitch to repair.
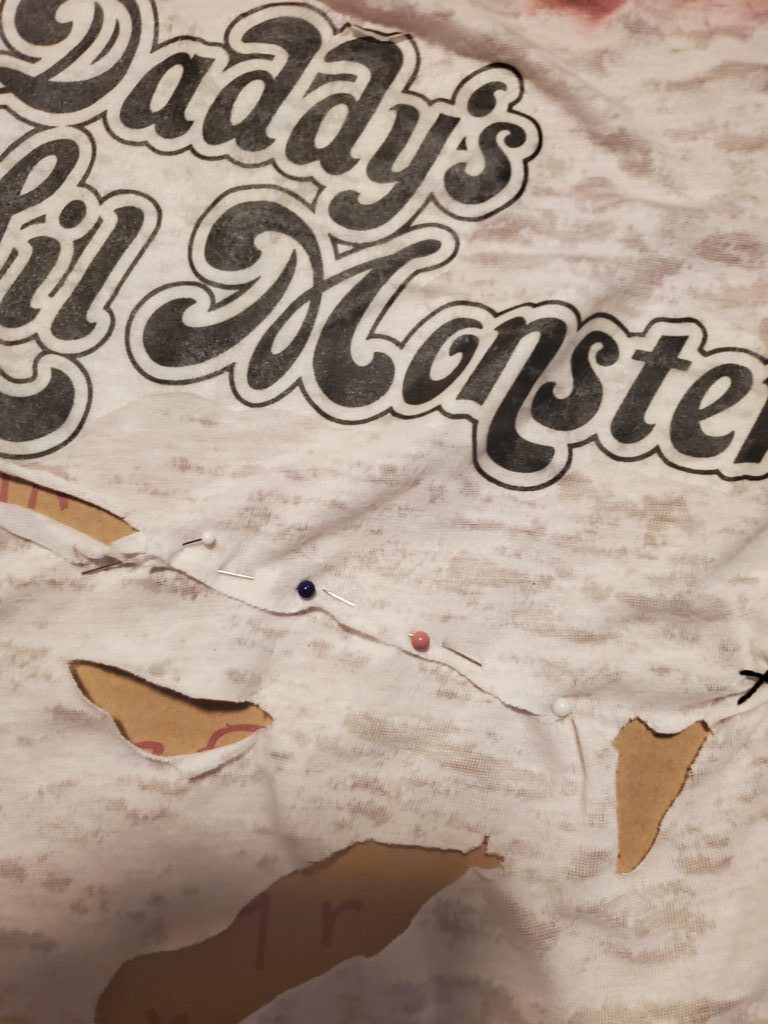
Now do the same thing to the belly-button hole. Extend it to the right, fold it over, pin it and use a laced running stitch to repair it. Here's a pic with the running stitch finished before I removed the pins:
All done! Here's another shot of the finished shirt to see the stitching. That wasn't so hard!
Pants, Jacket, Wig, Accessories
The next step was the pants and belt, which I wasn't sure I could do, but I was going to try. But I found amazing pants with a built-in belt that looked fantastic. I bought it from here
I also found a pretty nice choker. I had to modify this slightly. The original Harley choker had a gold-colored belt, while this was white. I just used some gold acrylic paint to fix that. The belt was too small for my neck, so I attached it with some string in the back when I wore it. You can get the choker here.
I was going to make the bat, but bats are crazy expensive! I found a pretty good rubber substitute. It doesn't look that great close-up. But it's pretty great from a short distance away and in the photos. You can get that here.
The wig I found at Wig is Fashion. You can get it here. I love the wig and the dye job, but I didn't think the styling was correct. I fixed that and used these cute hair pigtail ornaments.
I wanted a Harley jacket. The one I got is far from perfect, but it's pretty good. I got it from F-Jackets. I tried to find a link, but they don't seem to carry it anymore, which is a shame.
The extensive and complicated Harley tattoos are a crucially important accessory. I was lucky to find a complete set, really amazing, from here. If you want them to last, apply all of them before you put your foundation on. I didn't do that, so the face ones fell off sooner. The body and leg ones stayed on for almost a week, which I enjoyed, but you can wash them off if you want. Look at the photos of Harley carefully to get them in the right place.
Other, omitted or substitute accessories
Harley has some cool, spikey brass cuffs, which I couldn't find in my size. I used some brass collar cuffs I already had around instead. She also sometimes wears holsters which I decided not to use. Not all pictures have them, and I favor the bat. The final and crucial elements of this look are the boots, which I also had to make and deserve a separate article.
That's it for the shirt and accessories. I hope this answers your questions and maybe inspires you to try a Harley of your own or do a version of one or more of your favorite characters. If you have comments, send the nice ones to me.